
Introduction to Artisan No-Knead Pizza Crust
Why Homemade Pizza is the Ultimate Kitchen Win
There's something incredibly satisfying about biting into a slice of homemade pizza. Picture this: the aroma of freshly baked dough, the sound of that perfect crisp as you take your first chew, and the vibrant colors of your favorite toppings. What if we told you that you could achieve this artisanal experience without the need for intensive kneading?
Enter the Artisan No-Knead Pizza Crust. This simple yet rewarding recipe gives you the power to create tantalizing, gourmet-quality pizza right from your kitchen. It's all about maximizing flavor while minimizing effort. With just a few ingredients — like high-protein bread flour and a touch of yeast — you can craft a crust that's airy on the outside and delicately thin inside. Plus, it's a layout that allows for meal prepping. You can store the dough in the fridge for up to six days, turning any weekday into an impromptu Pizza Night.
Imagine making two delicious 10" to 12" pizzas that will have everyone coming back for more. Whether you're entertaining friends or enjoying a cozy night in, this crust will undoubtedly become your secret weapon in the kitchen. Get ready to impress!
Ingredients for Artisan No-Knead Pizza Crust
Essential ingredients for the dough
Creating a perfect Artisan No-Knead Pizza Crust starts with high-quality ingredients. Here’s what you’ll need:
- 2 cups plus 1 tablespoon (247g) of bread flour: This is key for a chewy and airy crust. You can also use all-purpose flour if you prefer a softer texture.
- ⅛ teaspoon active dry or instant yeast: This helps the dough rise beautifully.
- ½ teaspoon granulated sugar: Just a pinch to feed the yeast and enhance browning.
- 1 ¼ teaspoons table salt: Essential for flavor.
- ¾ cup plus 1 tablespoon (185g) lukewarm water: This hydrates the dough, creating the perfect consistency.
Toppings that elevate your pizza game
Once you nail the crust, the fun really begins! The right toppings can transform your pizza into a gourmet experience. Here are a few ideas to get your creative juices flowing:
- Fresh mozzarella: Melting beautifully and adding that classic pizza taste.
- Turkey bacon: A smoky twist that pairs well with sweet BBQ sauce.
- Roasted vegetables: Think butternut squash or sweet potatoes for added texture and flavor.
- Arugula or basil: Toss right on after baking for a fresh finish.
Explore unique combinations and don’t be afraid to experiment with flavors! Each topping carries its own potential for a delightful culinary experience.
Preparing Artisan No-Knead Pizza Crust
Making a stellar Artisan No-Knead Pizza Crust is both an art and a science. This straightforward process involves a few crucial steps, but don't worry; we've got your back! Follow along to create a crust that’s light, airy, and absolutely delicious.
Combine and rise the dough
Start by gathering your ingredients and combining them in a large bowl. Mix together 2 cups of King Arthur Unbleached Bread Flour, a pinch of active or instant yeast, sugar, salt, and lukewarm water. Stir until everything is well mixed; the dough will be sticky and rough, and that's perfectly okay! Cover the bowl with plastic wrap or a clean towel, and let it rise at room temperature for 24 hours. This slow fermentation is what gives our Artisan No-Knead Pizza Crust its unique flavor and texture.
Preheat your oven correctly
Preheating your oven might seem simple, but getting it right is essential for the perfect pizza. Place a baking steel or stone in the oven and crank it up to a scalding 500°F to 550°F. It’s important to let it preheat for at least 30 minutes to ensure a nicely baked crust. The hot surface will help your pizza develop that golden-brown, crispy exterior we all love.
Shape the dough pieces
Once your dough has risen, it’s time to shape it. Lightly flour your work surface and divide the dough into two equal pieces. Gently transfer one portion onto the floured surface and work with it to avoid tearing. Remember, you want the dough to retain some of those air bubbles formed during the rise!
Lightly stretch and prepare the crust
Now comes the fun part! Grab the edges of your dough and stretch it gently into a circle, about 10-12 inches in diameter. Lean on your knuckles for help; they should do the trick to maintain that thick outer edge. Transfer the shaped dough to a well-floured pizza peel or a parchment-lined baking sheet. Just a tip: if you're using parchment, trim the excess to prevent burning.
Add sauce and toppings
Here’s where creativity shines! Add your favorite pizza sauce lightly across the surface, being cautious not to overload. You can opt for traditional tomato sauce or experiment with options like BBQ. After that, unleash your toppings! Whether it’s Turkey Bacon, roasted veggies, or even a sprinkle of cheese, make it your masterpiece.
Bake your pizza to perfection
With your toppings ready, it’s time to slide your pizza into that hot oven. If you have a broiler, turn it on to finish off your crust with a lovely char. Bake for about 6-8 minutes until the edges are bubbly and golden. And don’t forget the finishing touch—maybe some freshly grated Parmesan on top before slicing it up to serve.
With these steps, you're all set to enjoy a delightful artisan pizza experience right at home. The flavors—trust me—will impress anyone you share it with!
Variations on Artisan No-Knead Pizza Crust
Veg Vinaigrette Pizza for a Fresh Twist
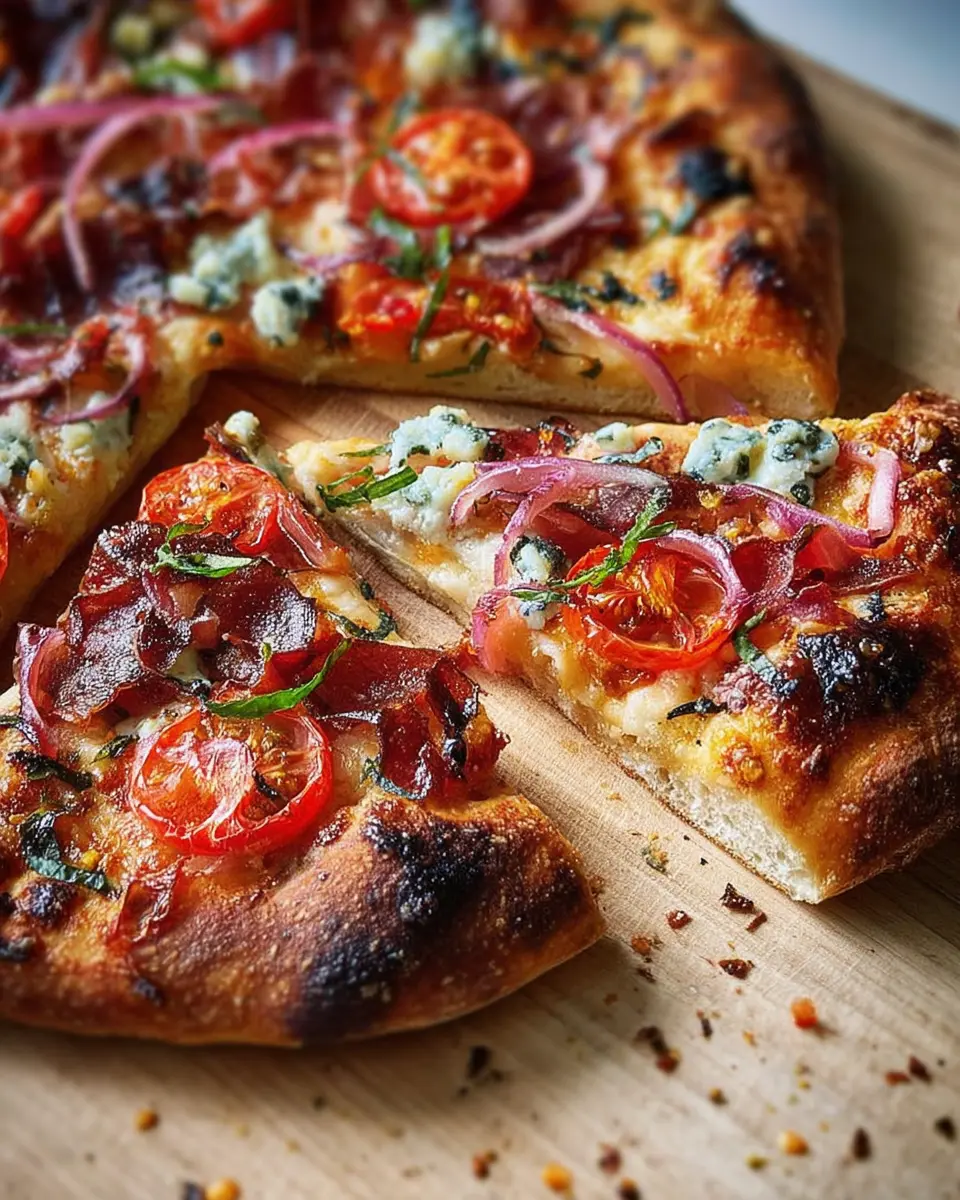
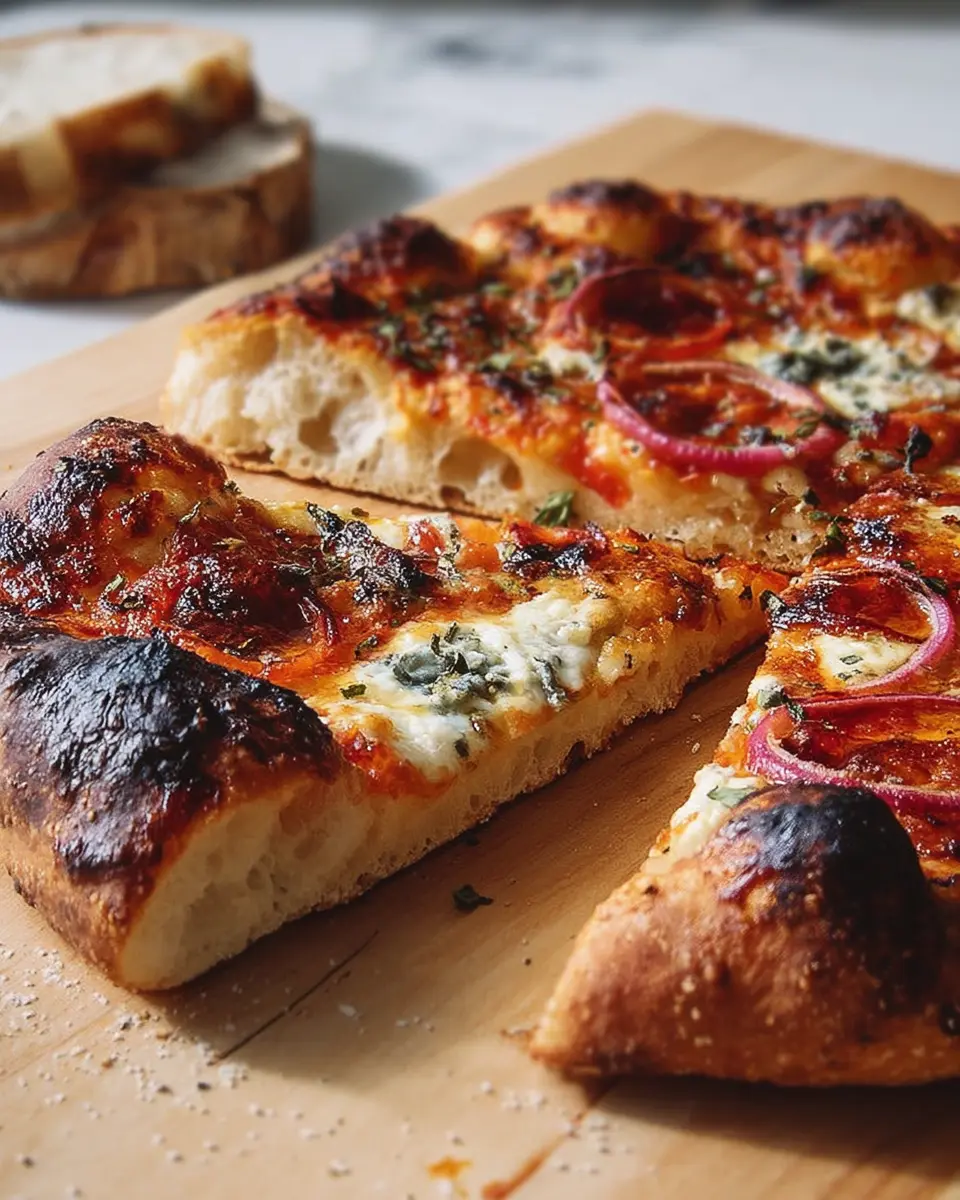
If you're looking for a bright and refreshing take on the classic Artisan No-Knead Pizza Crust, the Veg Vinaigrette Pizza is a perfect choice. Start with a base of rich red sauce and a sprinkle of mozzarella. Then, top it with roasted butternut squash or sweet potatoes. The magic happens when you drizzle your favorite vinaigrette after baking; the warm crust absorbs the flavors beautifully! For a pop of color, add quick-pickled red onions or radishes and finish with feta or crumbled blue cheese for an extra punch.
Smoky-Sweet Pizza for BBQ Lovers
For those who crave a BBQ-inspired treat, the Smoky-Sweet Pizza will hit the spot. Begin with a thin layer of BBQ sauce on your Artisan No-Knead Pizza Crust, followed by grated mozzarella. Top it with juicy sliced pears and Turkey Bacon that's been cooked until just pliable. Flash-fried scallions take this savory delight to another level! After baking, finish with a drizzle of your favorite BBQ sauce, mixed with a hint of tomato sauce, for a balance of sweetness and tang. It's the ultimate treat for BBQ enthusiasts.
Explore more twists on this versatile dough to make every pizza night a new adventure!
Cooking tips and notes for Artisan No-Knead Pizza Crust
Tips for dough storage and flavor enhancement
To get the most out of your Artisan No-Knead Pizza Crust dough, you can store it in the refrigerator for up to six days. This not only extends the life of your dough but also enhances its flavor as it ferments. Just remember to cover it tightly to prevent any drying out. Before using, let it rest at room temperature for about 30 minutes.
Importance of preheating your baking surface
Never underestimate the power of a well-preheated baking surface! Preheating your baking steel or pizza stone to 500°F to 550°F ensures an evenly cooked crust with that desirable crispy texture. Aim for at least 30 minutes of preheating in your oven to get it just right. Trust me, your pizza will thank you! For more tips on equipment, check out King Arthur Baking.

Serving suggestions for Artisan No-Knead Pizza Crust
Pairing drinks with your homemade pizza
When enjoying your Artisan No-Knead Pizza Crust, consider refreshing non-alcoholic options that complement the flavors of your toppings. Try serving:
- Sparkling water infused with lemon or cucumber for a light, crisp contrast.
- Iced herbal teas, like mint or hibiscus, which add a flowery note that pairs beautifully with rich ingredients.
- Craft sodas, which can bring an interesting twist. Look for flavors like ginger or blood orange.
These beverages can enhance your dining experience without overwhelming the delicious taste of your homemade pizza.
Presentation ideas for pizza night
A visually appealing pizza night sets the right mood. Here are a few fun presentation ideas to elevate your Artisan No-Knead Pizza Crust:
- Use a wooden pizza board or slate to serve your pies; it gives an artisanal feel.
- Sprinkle fresh herbs on top of your pizzas for a pop of color and aroma — basil, oregano, or arugula work great.
- Incorporate varied toppings on each pizza for visual diversity. Arrange them carefully on the board to showcase their unique flavors.
Setting the stage with these elements makes pizza night feel special, turning a casual meal into a fun event. Enjoy!
Time Breakdown for Artisan No-Knead Pizza Crust
Preparation Time
Getting started is quick and easy! You’ll need about 15 minutes to gather your ingredients, mix the dough, and cover it up for the first rise.
Rising and Resting Time
The magic truly begins during the 24-hour rise. This long fermentation not only makes the dough flavorful but also develops that perfect artisan texture. If you want to develop the flavor even more, feel free to refrigerate it for up to six days.
Total Time
All in all, your mission for the Artisan No-Knead Pizza Crust will take around 1 day and 30 minutes (including prep, rising, and baking time). This allows you to enjoy fresh pizza whenever the craving strikes!
Whether you're a novice or an experienced home chef, this timeline allows for flexibility and spontaneity—so you can easily turn any night into a pizza night!
Nutritional Facts for Artisan No-Knead Pizza Crust
Understanding the nutritional profile of your Artisan No-Knead Pizza Crust can help you make informed choices. Here’s a quick glance at what to expect per serving:
Calories
Each serving of this delightful pizza crust contains approximately 150 calories, making it a reasonably light base for your favorite toppings.
Protein
You'll be pleased to find about 5 grams of protein per serving, courtesy of the high-protein bread flour used in the recipe. This provides a great energy boost that can keep you feeling satiated longer.
Sodium
With about 130 milligrams of sodium per serving, this crust strikes a balance between flavor and health, allowing you to enjoy your pizza without excessive salt.
Now that you're informed on the nutritional aspects of your Artisan No-Knead Pizza Crust, feel free to customize the toppings to suit your tastes and dietary needs!
FAQs about Artisan No-Knead Pizza Crust
Can I use all-purpose flour instead?
Absolutely! You can use all-purpose flour instead of the recommended bread flour. While bread flour gives you that lovely chewy texture, all-purpose flour will still yield a delicious crust, just with a slightly different, more tender bite. You don't need to make any other adjustments to the recipe—keep it simple and delightful!
How can I store leftover dough?
If you have leftover dough, don’t fret! You can store it in the fridge for up to six days. Just make sure to place it in an airtight container or wrap it in plastic wrap to prevent it from drying out. This also allows the flavors to develop further. When you’re ready to bake, simply take it out and let it come to room temperature before shaping your crust!
What are the best toppings for this pizza?
The beauty of this Artisan No-Knead Pizza Crust is its versatility. Here are some popular topping ideas:
- Veggie Delight: Include roasted butternut squash or sweet potatoes, drizzled with a vinaigrette after baking.
- Smoky-Sweet: Try a base of BBQ sauce topped with turkey bacon, sliced pears, and scallions.
- Classic Margherita: Go for fresh mozzarella, basil, and a drizzle of olive oil.
Experiment with what you love best, and don't hesitate to mix and match!
Conclusion on Artisan No-Knead Pizza Crust
In summary, the Artisan No-Knead Pizza Crust is a game-changer for pizza lovers. With minimal effort, you can create a delicious, puffy crust that impresses friends and family alike. Experiment with toppings to personalize your pizza nights. Remember, flavor gets better with time, so don't hesitate to refrigerate your dough! For more tips and tricks on pizza making, be sure to explore resources like King Arthur Baking and elevate your home cooking experience.
Artisan No-Knead Pizza Crust
Equipment
- baking steel
- pizza peel
- floured surface
Ingredients
Dough
- 2 cups plus 1 tablespoon King Arthur Unbleached Bread Flour (247g)
- ⅛ teaspoon active dry yeast
- ½ teaspoon granulated sugar
- 1 ¼ teaspoons table salt (8g)
- ¾ cup plus 1 tablespoon water (185g), lukewarm
Toppings
- Veg Vinaigrette Optional, see tips for details
- Smokey-Sweet Pizza Optional, see tips for details
Instructions
Preparation and Baking
- Weigh your flour; or measure it by gently spooning it into a cup, then sweeping off any excess. Stir all of the ingredients together. Cover the rough, sticky dough and let it rise at room temperature for 24 hours. After this first rise, you may choose to refrigerate the dough for up to six days, which will help develop its flavor.
- With a rack in the center, preheat the oven to 500°F to 550°F with a baking steel or stone inside. Make sure the oven is at least 500°F for a full 30 minutes before baking your pizza, in order for the steel or stone to preheat thoroughly.
- Divide the dough in half. Working with one piece at a time, transfer the dough to a well-floured surface.
- Stretch and fold it, as follows: Holding onto the dough at both ends, pull one end away from the other, then fold it back onto itself. Repeat on the other side so that all four corners of the dough have been stretched and folded.
- Next, pull the ends of the dough toward the middle, then turn it over. Using your fingers, pull the dough under itself to make a smooth, round ball with the seams tucked into the bottom. Repeat with the other piece of dough. Place each ball seam-side down into a floured bowl.
- Cover the bowls and allow the dough to proof (rise) for 45 minutes to an hour, while your oven preheats.
- Working with one piece at a time, transfer the dough to a well-floured work surface and dust the top with flour. Use your fingertips to gently depress the surface, being careful not to touch the outer edge of the crust; you want it to remain thick.
- Lift up the crust and use your knuckles to gently stretch it into a circle about 10" to 12" in diameter. Move it to a well-floured pizza peel or floured sheet of parchment.
- Lightly sauce the dough, then add your toppings of choice.
- Turn on the top broiler in your preheated oven and transfer the pie to the steel or stone.
- Gently slide the pizza onto the steel or stone. Bake the pizza for approximately 6 minutes on the steel (or 7 minutes on the stone), until bubbly and charred on the edges.
- Remove the pizza from the oven and top it with freshly grated Parmesan, if desired. Slice and serve the pizza immediately.
- Repeat with the remaining dough and toppings.


Leave a Reply