
Introduction to Artisan No-Knead Pizza Crust
Why Artisan No-Knead Pizza Crust is a Game Changer for Homemade Pizza Lovers
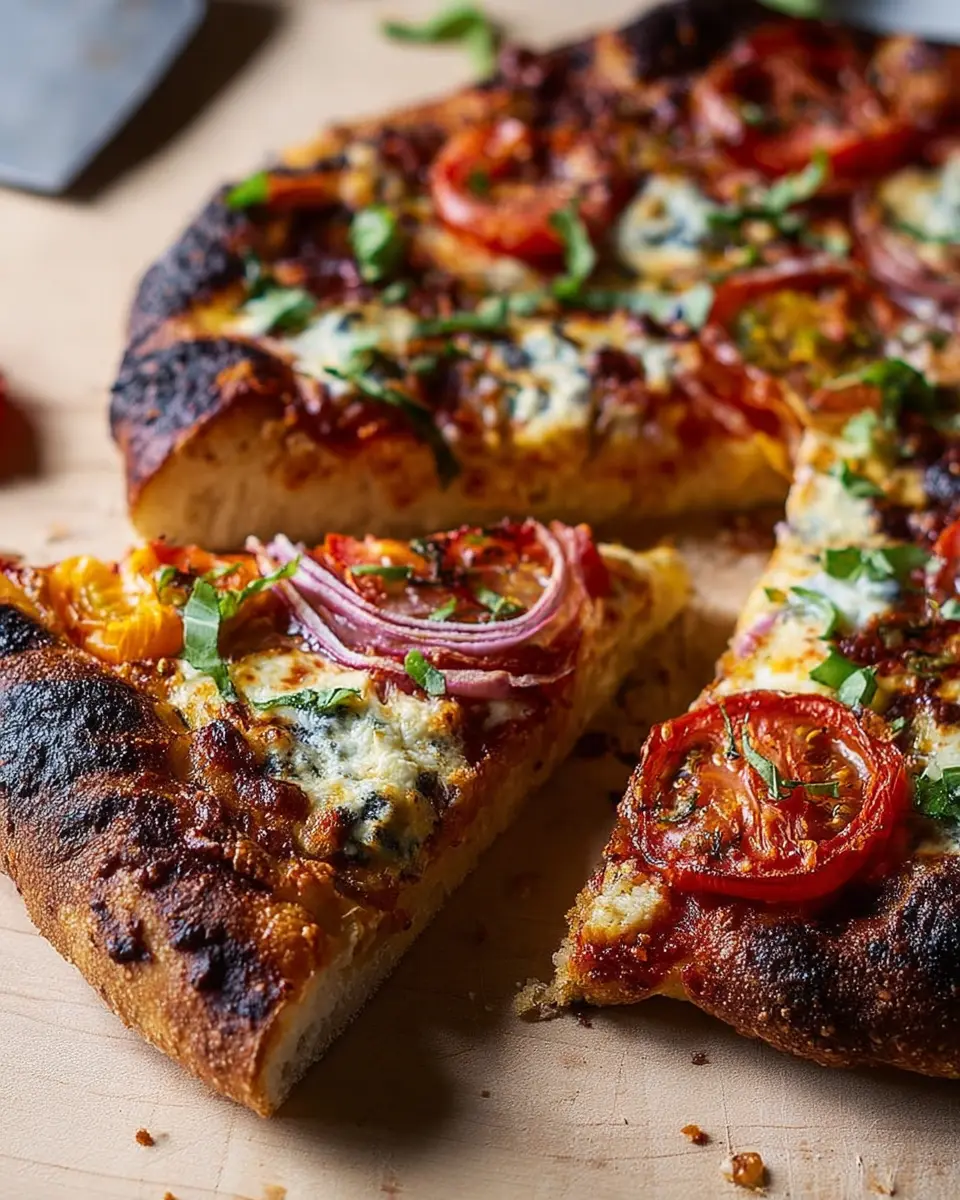
If you've ever dreamed of crafting pizzeria-quality pizza at home, the artisan no-knead pizza crust is your golden ticket. This method revolutionizes the traditional pizza-making process, offering a deliciously chewy and airy crust without the backache of kneading dough for hours. Picture this: you mix a few simple ingredients, let the magic happen overnight, and voilà! You have beautiful dough ready to transform your weeknight dinners into gourmet experiences.
The beauty of this recipe lies in its flexibility. Using high-protein bread flour enhances not just the structure but also the flavors in every bite. Plus, with the option to refrigerate the dough for up to six days, you can have fresh pizza whenever the cravings strike. And you won’t need a wood-fired oven; just a simple preheated baking steel or stone can mimic those authentic pizza vibes right in your kitchen.
Forget complicated techniques and embrace the simplicity of this artisan no-knead pizza crust recipe. Whether you’re hosting friends or enjoying a cozy night in, you’ll find that great pizza is now easier than ever to achieve.
Ingredients for Artisan No-Knead Pizza Crust
Essential Ingredients for the Dough
Creating the perfect artisan no-knead pizza crust starts with a few essential ingredients. Here's what you'll need:
- 2 cups plus 1 tablespoon (247g) King Arthur Unbleached Bread Flour: This high-protein flour is key to achieving that chewy texture.
- ⅛ teaspoon active dry yeast or instant yeast: A small amount goes a long way in fluffing up your crust.
- ½ teaspoon granulated sugar: Adds a hint of sweetness and helps activate the yeast.
- 1 ¼ teaspoons (8g) table salt: Balances the flavors and enhances the dough's overall taste.
- ¾ cup plus 1 tablespoon (185g) lukewarm water: Provides the necessary hydration for a perfect dough consistency.
Recommended Toppings for Creativity
Now that your dough is ready, let your imagination run wild with toppings! Here are some ideas to elevate your artisan pizza game:
- Veg Vinaigrette Pizza: Top with homemade red sauce and mozzarella, then add roasted vegetables like butternut squash. After baking, drizzle with your favorite vinaigrette for an aromatic finish.
- Smoky-Sweet Pizza: Use BBQ sauce as a base, then add mozzarella, sliced pears, and turkey bacon for a sweet-savory combo that’s hard to resist.
Feel free to explore seasonal vegetables, local cheeses, or even a sprinkle of herbs—each adds a unique twist to your pizza experience!
Preparing Artisan No-Knead Pizza Crust
Making your own artisan no-knead pizza crust can be an incredibly rewarding culinary experience. The simplicity of no-knead dough allows for impressive results with minimal effort. Let's dive into how you can bring this deliciousness to your table with ease!
Gather Your Ingredients and Tools
Before you get started, you'll need to collect a few essential ingredients and tools. Here's what you'll need:
-
Ingredients:
-
2 cups plus 1 tablespoon (247g) of King Arthur Unbleached Bread Flour (for that perfect chewy crust)
-
⅛ teaspoon of active dry yeast or instant yeast
-
½ teaspoon of granulated sugar
-
1 ¼ teaspoons (8g) of table salt
-
¾ cup plus 1 tablespoon (185g) of lukewarm water
-
Tools:
-
A large mixing bowl
-
Plastic wrap or a clean kitchen towel
-
A baking steel or stone (for optimal baking)
-
A pizza peel or parchment paper
Having everything ready will make the process smoother and more enjoyable!
Mix the Ingredients and Let Them Rise
In a big bowl, combine the flour, yeast, sugar, salt, and lukewarm water. Stir until you have a rough and sticky dough, then cover it with plastic wrap or a cloth. Let it rise at room temperature for about 24 hours. This slow fermentation process is key to enhancing flavor and texture. After the first rise, feel free to refrigerate the dough for up to six days—prolonged fermentation leads to great taste improvements!
Preheat Your Oven and Prepare for Baking
While your dough is rising, preheat your oven. A high temperature is crucial for the perfect pizza crust. Aim for between 500°F to 550°F with your baking steel or stone inside. Make sure to let it preheat for at least 30 minutes—this helps your crust achieve that gorgeous golden char.
Shape Your Dough Into Pizza Crusts
Once your dough has risen, it’s time for some shaping magic. Divide the dough into two halves, and with a floured surface, gently stretch and fold each piece until it resembles a small ball. Let the balls rest in floured bowls, covered, for about 45-60 minutes while your oven continues to heat.
Add Sauce and Toppings Before Baking
Now comes the fun part—assembling your pizza! Transfer one dough ball to your work surface and gently stretch it into a 10" to 12" circle. Place it on a floured pizza peel or parchment paper, and then lightly sauce it. Don't hesitate to experiment with your toppings! Whether you prefer a classic margherita or something adventurous like our recommended Veg Vinaigrette Pizza, let your creativity shine.
Bake and Enjoy!
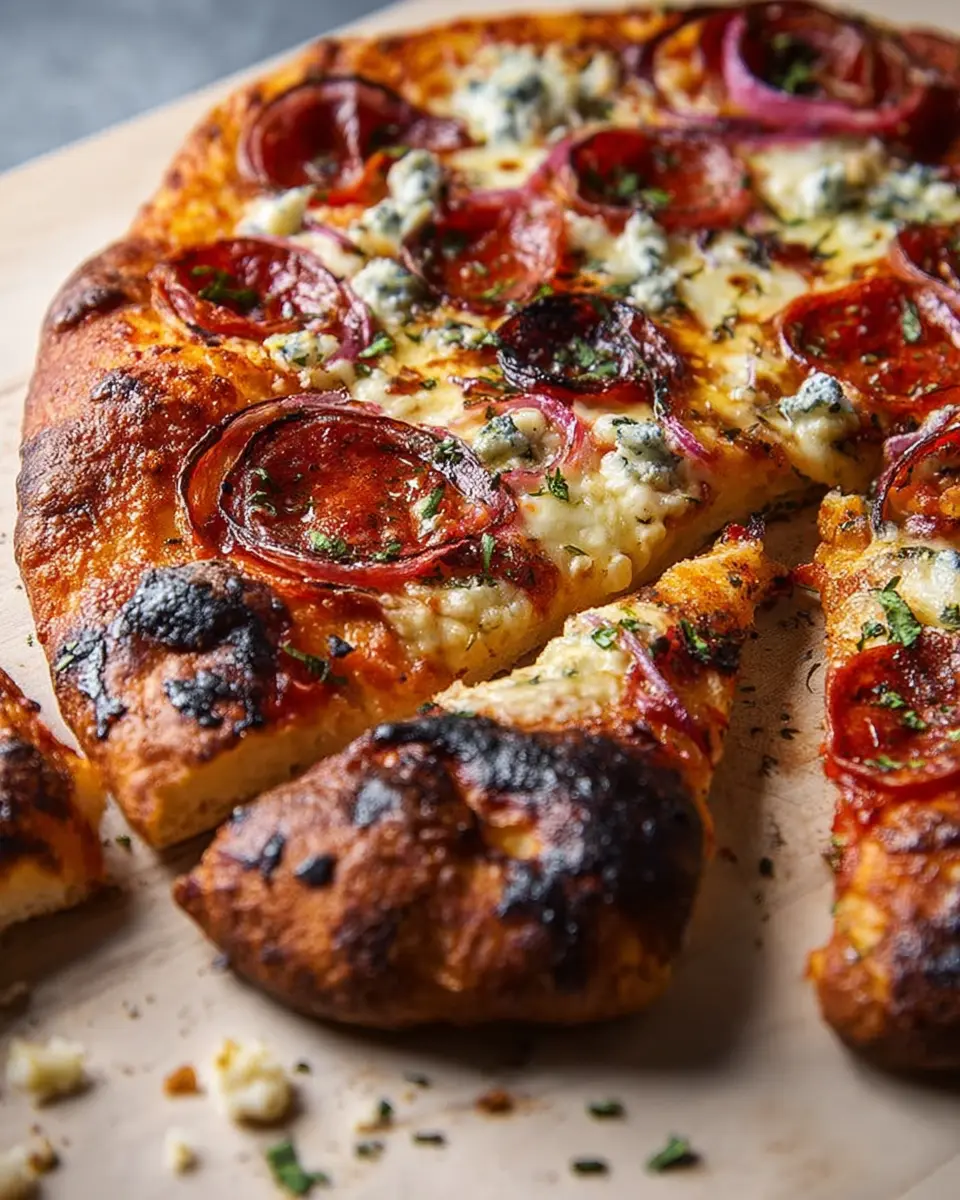
Turn on your oven’s top broiler and slide your pizza onto the steel or stone. Bake for 6-8 minutes, watching closely for a bubbly, charred crust. If you like, sprinkle some freshly grated Parmesan over the top before serving. Enjoy your homemade artisan no-knead pizza crust hot from the oven, and don’t forget to savor the pride of making it all from scratch!
By following these simple steps, you’ll create a pizza experience right in your home that rivals your favorite pizzeria. Happy baking!
Variations on Artisan No-Knead Pizza Crust
Veg Vinaigrette Pizza for Veggie Lovers
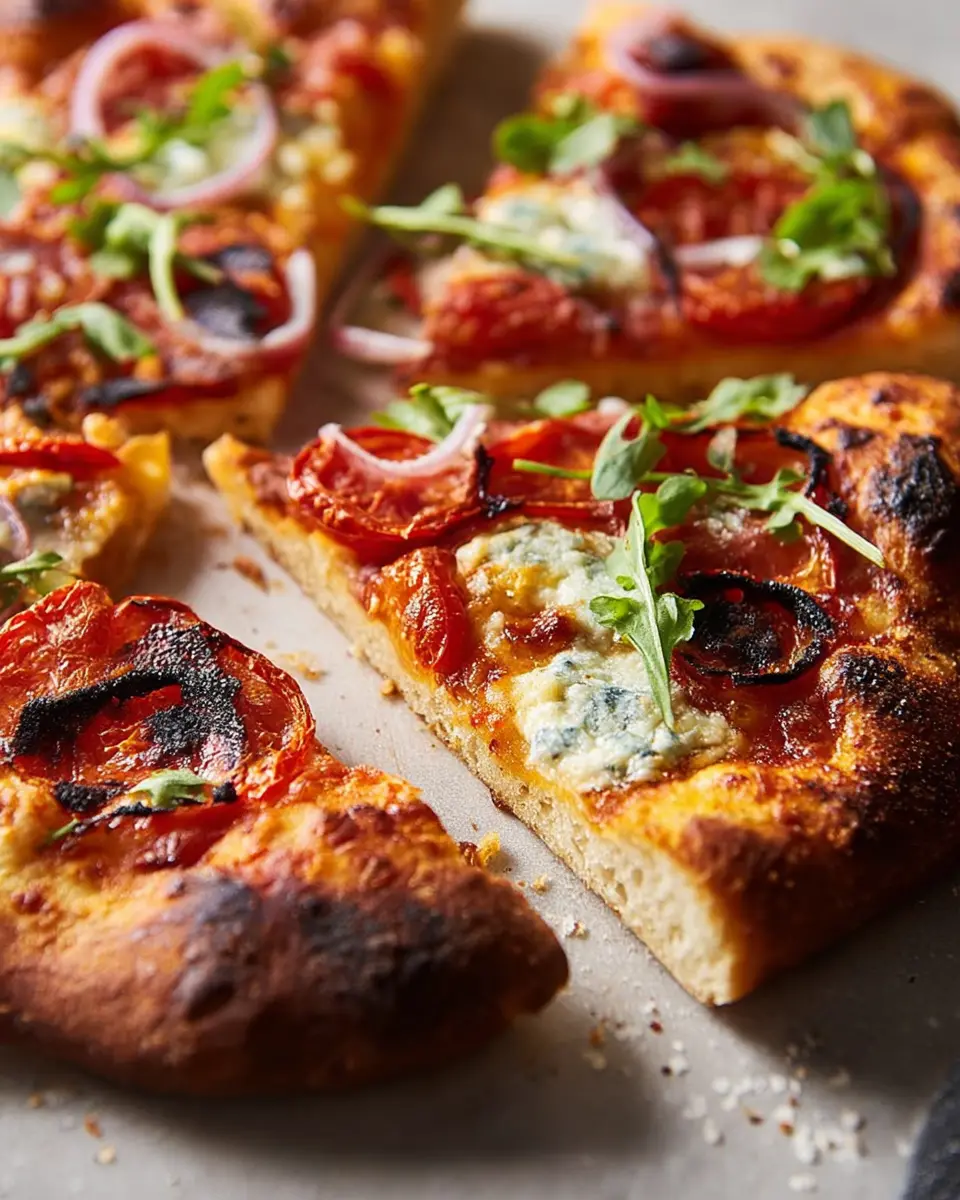
If you’re a fan of fresh flavors, this Veg Vinaigrette Pizza will quickly become your go-to. Start with a base of marinara sauce topped with a sprinkle of mozzarella. Layer on roasted butternut squash or sweet potato for added sweetness, and don’t forget to finish with a drizzle of your favorite vinaigrette. The magic happens when the vinaigrette hits the hot crust, releasing fragrant aromas. Quick-pickled red onions or radishes add a zesty kick, and a sprinkle of feta or blue cheese elevates the dish even further.
Smoky-Sweet Pizza for a Unique Twist
For those who crave a unique twist, the Smoky-Sweet Pizza is a delightful choice. Instead of tomato sauce, let BBQ sauce be your base, topped with mozzarella. Add slices of juicy pears, turkey bacon, and crispy scallions for texture. After baking, finish it off with a drizzle of BBQ sauce mixed with tomato sauce. This combination brings your artisan no-knead pizza crust to life with contrasting flavors you won't be able to resist.
Would you like to dive deeper into other variations or topping ideas? Let your imagination run wild with this adaptable crust!
Cooking Tips and Notes for Artisan No-Knead Pizza Crust
Tips for Handling Sticky Dough
When working with your artisan no-knead pizza crust dough, a little stickiness is normal! To manage this, always flour your work surface generously. Alternatively, lightly wet your hands while shaping the dough—this helps prevent it from sticking. Don’t be afraid to embrace the stickiness; it means your dough has great hydration, which is essential for that wonderful chewy texture.
Best Practices for Baking at High Temperatures
To achieve that perfect artisan-style crust, preheat your oven to a sizzling 500°F to 550°F. This ensures your baking stone or steel gets adequately hot—crucial for that crispy outer edge. Make sure to bake your pizza in the upper portion of the oven for even cooking. If your oven has a broiler, use it to enhance those deliciously charred spots! Just be cautious and keep around 8 inches of clearance from the broiler.
Want more tips on perfecting your pizza? Check out King Arthur Baking’s resources. Happy baking!
Serving suggestions for Artisan No-Knead Pizza Crust
Side dishes to complement your pizza
Pair your artisan no-knead pizza crust with some delightful side dishes for the perfect meal. A simple arugula salad drizzled with olive oil and a splash of lemon adds brightness to your pizza night. Consider a roasted vegetable platter—zucchini, peppers, and asparagus make for vibrant, flavorful sides. For a heartier option, garlic knots or a warm focaccia to dip in olive oil can take your dining experience to another level.
Beverage pairings for your homemade pizza night
When it comes to drinks, consider sparkling soda or flavored sparkling water to refresh your palate between bites of that delicious pizza. A rich iced tea, either sweet or unsweetened, can balance the flavors of your toppings beautifully. If you're feeling adventurous, try a homemade lemonade infused with herbs for a unique twist. The magic of artisan no-knead pizza crust truly shines when paired with the right company of food and drink!
Time Breakdown for Artisan No-Knead Pizza Crust
Preparation Time
Before diving into the deliciousness of artisan no-knead pizza crust, you'll spend about 15 minutes prepping your dough. It’s simple—just mix your ingredients and let the magic begin!
Proofing Time
Next comes the proofing phase, where patience pays off. Allow your dough to rise for 24 hours at room temperature. If you’re planning ahead, refrigerating the dough can develop even richer flavors over a few days.
Baking Time
When you’re ready to bake your pizza, expect about 4 to 8 minutes for that crispy, bubbly crust.
Total Time
From start to finish, you’re looking at a total of 1 day and 30 minutes. Keep in mind, most of that is just dough marinating, so it's perfect for your busy schedule!
For an in-depth look at ingredients, tips, and tricks for achieving the best artisan no-knead pizza, don't forget to check out King Arthur Flour.
Nutritional Facts for Artisan No-Knead Pizza Crust
Estimated Calories Per Slice
This delightful artisan no-knead pizza crust packs about 150 calories per slice, making it a satisfying base for your favorite toppings without going overboard on calories.
Protein Content
Each slice boasts approximately 5 grams of protein, thanks to the high-protein bread flour used in the recipe. This can be especially beneficial if you're looking to enjoy a hearty meal while being mindful of your protein intake.
Sodium Levels
With about 200 milligrams of sodium per slice, this pizza crust maintains a reasonable sodium level, providing delicious flavor without overpowering your dietary needs. Enjoy your pizza night without the guilt!
For more insights on flour's nutritional benefits, check out King Arthur Baking.
FAQs about Artisan No-Knead Pizza Crust
How can I make my pizza crust chewier?
If you're aiming for that irresistibly chewy texture in your artisan no-knead pizza crust, consider increasing the protein content. Using a higher percentage of bread flour, like the one from King Arthur, is key. Additionally, letting the dough rise longer—preferably in the fridge for a few days—can enhance its chewiness through fermentation, which develops flavor and strengthens gluten.
Can I freeze leftover pizza dough?
Absolutely! Freezing leftover artisan no-knead pizza crust dough is a fantastic way to save it for later. Just wrap the dough tightly in plastic wrap and store it in an airtight container or freezer bag. It will keep well for up to three months. When you're ready to use it, transfer the dough to the fridge for a night to thaw before letting it come to room temperature.
What are some good alternative toppings?
The beauty of pizza lies in its versatility! For alternative toppings, try:
- Turkey bacon for a smoky flavor
- Chicken ham paired with fresh pineapple
- Seasonal veggies like roasted butternut squash or bell peppers
- A drizzle of balsamic glaze or your favorite vinaigrette for that gourmet touch
Get creative and mix and match to find your perfect pie!
Conclusion on Artisan No-Knead Pizza Crust
In summary, this artisan no-knead pizza crust is a game-changer for home cooks. With minimal effort and a little patience, you can achieve a crust that's both chewy and airy, reminiscent of a traditional pizza oven. Enjoy experimenting with toppings, and transform any evening into a delightful Pizza Night!

Artisan No-Knead Pizza Crust
Equipment
- oven
- baking steel
- pizza peel
Ingredients
Dough
- 2 cups King Arthur Unbleached Bread Flour Plus 1 tablespoon
- ⅛ teaspoon active dry yeast or instant yeast
- ½ teaspoon granulated sugar
- 1 ¼ teaspoons table salt (8g)
- ¾ cup water Lukewarm plus 1 tablespoon
Toppings
- Veg Vinaigrette or Smokey-Sweet Pizza ingredients Details can be found in tips
Instructions
Dough Preparation
- Weigh your flour; or measure it by gently spooning it into a cup, then sweeping off any excess. Stir all of the ingredients together. Cover the rough, sticky dough and let it rise at room temperature for 24 hours. After this first rise, you may choose to refrigerate the dough for up to six days.
- With a rack in the center, preheat the oven to 500°F to 550°F with a baking steel or stone inside.
- Divide the dough in half. Transfer one piece to a well-floured surface.
- Stretch and fold it by pulling one end away and folding it back onto itself, repeating for all four corners.
- Pull the ends towards the middle and turn it over to form a smooth round ball. Place each ball seam-side down into a floured bowl.
- Cover the bowls and allow the dough to proof for 45 minutes to an hour.
- Transfer the dough to a well-floured surface, dust the top with flour, and depress the surface gently.
- Lift up the crust and stretch it into a circle about 10" to 12" in diameter on a well-floured pizza peel or parchment.
- Lightly sauce the dough and add desired toppings.
- Turn on the top broiler and transfer the pie to the steel or stone.
- Gently slide the pizza onto the steel or stone and bake for approximately 6 to 7 minutes until bubbly and charred.
- Remove the pizza, top with freshly grated Parmesan if desired, slice, and serve immediately.
- Repeat with the remaining dough and toppings.
Tips
- To make the Veg Vinaigrette Pizza: Top with red sauce, mozzarella, roasted butternut squash or sweet potato, and drizzle with vinaigrette after baking.
- To make the Smoky-Sweet Pizza: Top with BBQ sauce, mozzarella, sliced pears, partially cooked bacon, and thinly sliced scallions, then drizzle with BBQ sauce after baking.

Leave a Reply