
Introduction to the Best Banana Pudding
When it comes to comfort desserts, few are as cherished as banana pudding. This classic Southern treat combines the delightful creaminess of pudding with the nostalgic crunch of vanilla wafers and the sweet, soft flavor of bananas. It's no wonder that banana pudding has earned its place as a beloved dessert across generations. People from all walks of life gather around this sweet indulgence, often sharing family recipes and delightful stories that add an extra layer of warmth to every bite.
So, what makes for the best banana pudding? It’s all about the balance of textures and flavors. The creamy pudding mingles with the fresh bananas, while the vanilla wafers soften just enough to create a delightful contrast. Plus, this no-fuss recipe is easy to whip up and perfect for gatherings or cozy nights in.
Did you know that banana pudding has historical ties? The dish dates back to the 19th century, with roots in both America and England. The blend of simple, accessible ingredients allowed for creative variations that have stood the test of time. To dive deeper into its history, check out this article on Southern Living. You'll not only learn about its past but also gather some inspiration to make your own version of the best banana pudding!
Ingredients for the Best Banana Pudding
Essential ingredients for a classic banana pudding
To whip up the best banana pudding, you’ll need a handful of straightforward ingredients that come together to create a delightful dessert. Here’s your shopping list:
- 2 cups cold milk: This serves as the base for the pudding.
- 1 (5-ounce) package instant vanilla pudding mix: This provides that rich, creamy texture.
- 1 (14-ounce) can sweetened condensed milk: It adds a luscious sweetness that's hard to resist.
- 1 tablespoon vanilla extract: For that extra flavor boost.
- 1 (12-ounce) container frozen whipped topping, thawed: This lightens up the texture beautifully.
- 1 (16-ounce) package vanilla wafers: Classic layers of crunch and flavor.
- 12 small bananas, sliced: Fresh bananas bring natural sweetness and a lovely pop of color.
Optionally adding some personal touches
Now, while this recipe is a classic, you can easily make it your own! Consider adding a sprinkle of cinnamon or nutmeg for a warm, spicy kick. You could even incorporate some crushed pecans or walnuts for an extra crunch. Want to take it to the next level? Try layering in some chocolate pudding between the vanilla layers. The options are endless, and they can really transform your best banana pudding into something uniquely yours!
For more tips and variations, check out The Kitchn for a wealth of ideas that could inspire your next baking adventure!
Step-by-step Preparation of the Best Banana Pudding
Making the best banana pudding doesn't have to be complicated. In just a few simple steps, you can create a creamy and delightful dessert that everyone will love! Let’s dive into how you can whip up this classic treat.
Gather all ingredients
Before you embark on your delicious banana pudding adventure, make sure you have all your ingredients ready. Here’s what you’ll need:
- 2 cups cold milk
- 1 (5-ounce) package instant vanilla pudding mix
- 1 (14-ounce) can sweetened condensed milk
- 1 tablespoon vanilla extract
- 1 (12-ounce) container frozen whipped topping, thawed
- 1 (16-ounce) package vanilla wafers
- 12 small bananas, sliced (or more as needed)
Having everything on hand not only speeds up the process but also ensures you don’t forget anything vital!
Mix milk and pudding mix
Start by pouring the cold milk into a large mixing bowl, then add the instant vanilla pudding mix. Using a whisk, mix them together vigorously for about 2 minutes. You'll want to see it thicken and get smooth. Instant pudding is super easy and really brings a wonderful texture to this dessert!
Incorporate the sweetened condensed milk
Once your pudding mixture is nice and smooth, it’s time to add the star ingredient: sweetened condensed milk. This adds a rich, creamy sweetness that’s hard to resist. Stir it in well until fully incorporated. This step really makes the flavor pop, don’t you think?
Fold in the whipped topping
Now, carefully fold in the thawed whipped topping. This is where the pudding gets its airy, light quality. Be gentle when folding, so you don't lose all that lovely volume you just created.
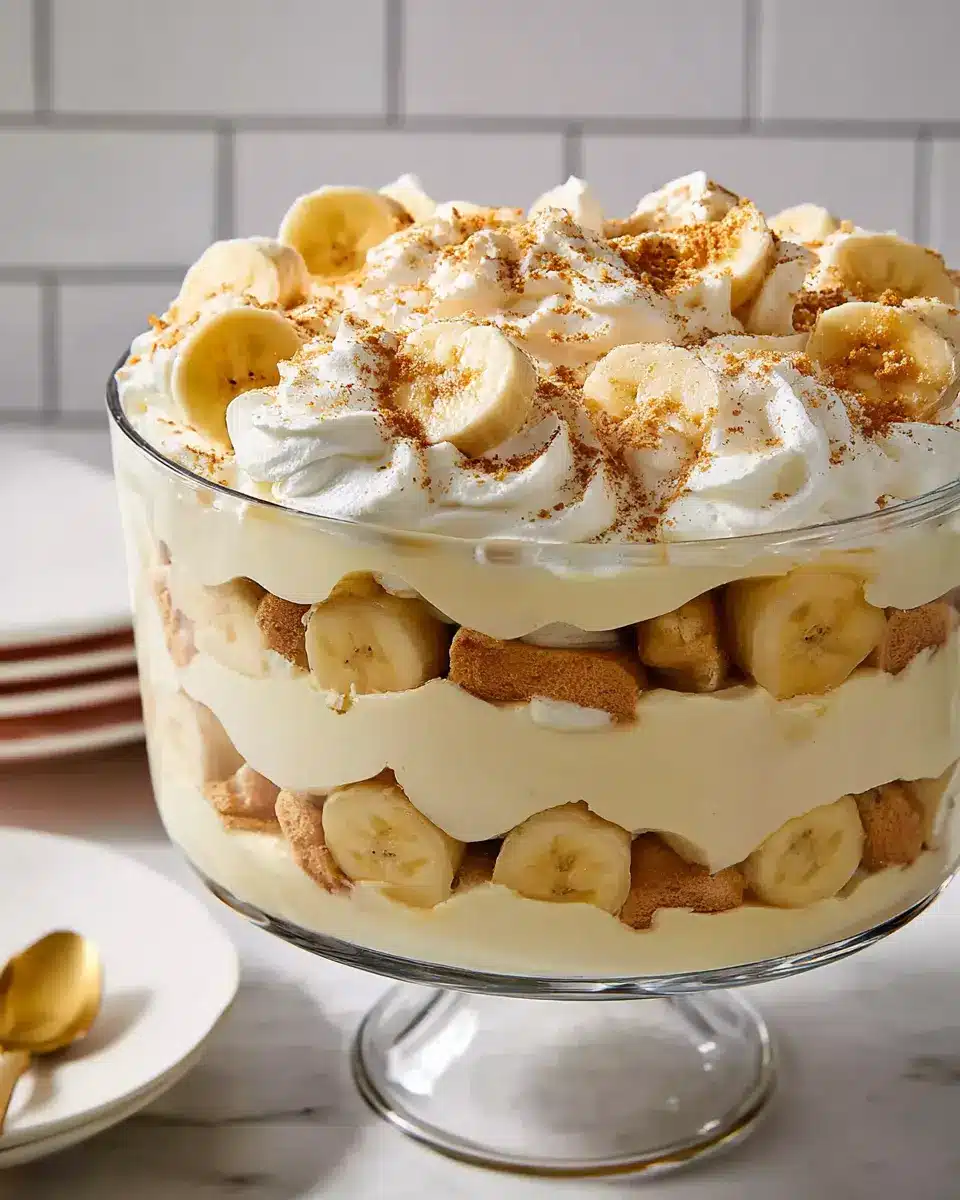
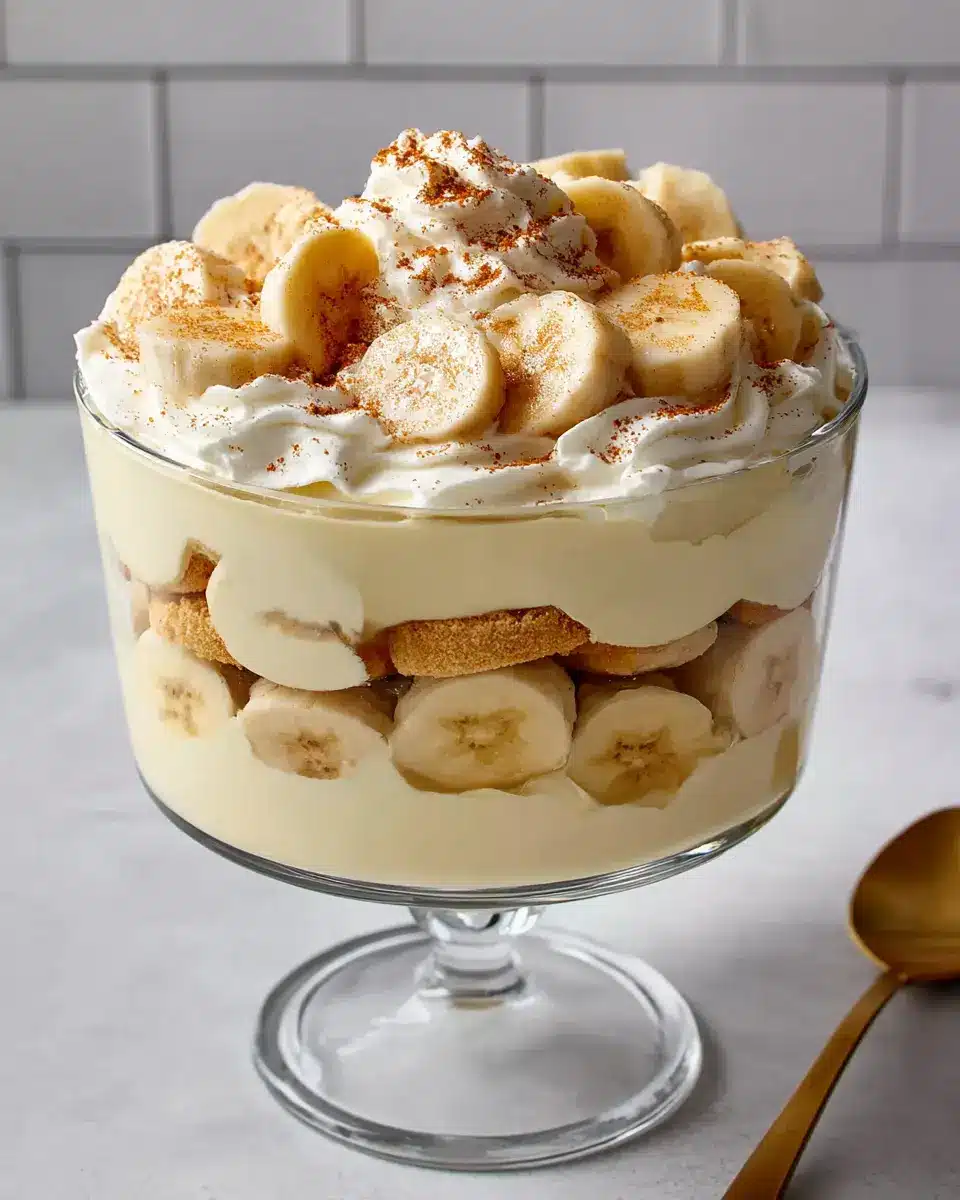
Layer the ingredients in a serving bowl
Now for the fun part—layering! Start with a layer of vanilla wafers at the bottom of your serving bowl, then add a generous layer of sliced bananas. Spoon your creamy pudding mixture over the bananas. Repeat these layers until you’ve used up all your ingredients, finishing with a layer of pudding on top. This beautiful layering not only enhances the taste but also makes for a stunning presentation!
Chill for optimal flavor
Your banana pudding is almost ready! To achieve that perfect taste and texture, cover the bowl and place it in the refrigerator for at least 1 hour. Chilling helps meld the flavors beautifully, resulting in the best banana pudding you’ve ever tasted! Right before serving, you might want to add some crushed vanilla wafers on top for an extra crunch.
Incorporating these steps makes the process easy, and trust me, everyone will be asking for seconds! Enjoy your delightful creation!

Variations on the Best Banana Pudding
When it comes to the best banana pudding, why stick to the classic recipe? Here are two delightful variations that add a little flair and excitement!
Chocolate Banana Pudding Twist
Elevate your pudding by introducing a chocolate layer! Simply add a package of instant chocolate pudding mix to your original recipe for a deliciously rich chocolate experience. Layer it between the traditional banana and vanilla wafers for a decadent treat that chocolate lovers will adore. Who can resist the harmony of chocolate and banana?
Nutty Banana Pudding Addition
Looking for a little crunch? Toss in some chopped pecans or walnuts between the layers of your best banana pudding. This nutty addition not only enhances the texture but also complements the sweet creaminess beautifully. You can even toast the nuts for an extra layer of flavor. It’s a fantastic way to surprise your guests and make this classic dessert uniquely yours.
Feel free to explore more ideas at Food Network and get inspired to make banana pudding your own!
Cooking Tips and Notes for the Best Banana Pudding
Choosing the Right Bananas
For the best banana pudding, select ripe, but not overly soft, bananas. Look for bananas with a mix of yellow and slight brown spots, which indicates sweetness. Avoid green bananas as they won’t lend the desired flavor. If you have extra bananas, they make a delightful snack!
Importance of Chilling Time
Don’t skip the chilling step! Letting your pudding sit in the fridge for at least an hour allows the flavors to meld and the texture to set perfectly. This time helps the vanilla wafers absorb some moisture while maintaining their delightful crunch. Trust the process—it’s worth the wait! For best results, consider chilling overnight, allowing the flavors to develop even further.
For more tips on maximizing flavor in desserts, check out this helpful guide.
Serving Suggestions for the Best Banana Pudding
Classic Presentation Ideas
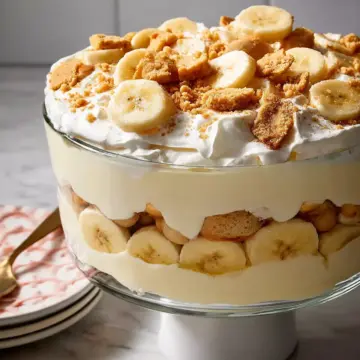
For a truly timeless experience, serve your best banana pudding in a large glass trifle dish. This allows the beautiful layers of vanilla wafers, banana slices, and creamy pudding to shine. Garnish the top with a sprinkle of crushed vanilla wafers or a few banana slices for that perfect finishing touch. Individual mason jars are a playful alternative for personal servings, making your dessert feel special and inviting!
Creative Serving Options
Want to switch things up? Consider layering your banana pudding in parfait cups with a twist. Add a layer of peanut butter or chocolate spread between the bananas and pudding for a delightful surprise. You could even turn it into a banana pudding ice cream sundae by topping a scoop of vanilla or chocolate ice cream with your banana pudding mixture, creating an irresistible dessert that wow your friends. For those looking for a lighter dose of sweetness, try pairing it with herbal tea for an afternoon treat!
Time Breakdown for the Best Banana Pudding
Preparation Time
Getting started on your best banana pudding is a breeze! You’ll need about 25 minutes to gather your ingredients, mix them up, and layer everything beautifully.
Chilling Time
For optimal flavor and texture, allow your pudding to chill in the refrigerator for at least 1 hour. This step is crucial for letting the flavors meld together perfectly.
Total Time
In just 1 hour and 25 minutes—most of which is hands-off waiting—you can whip up this delectable banana pudding that’s sure to impress your friends and family.
For further insights into chilling and serving desserts, check out this article from the Taste of Home, which dives into achieving perfectly creamy results!
Nutritional Facts for the Best Banana Pudding
Calories
Each serving of the best banana pudding contains approximately 329 calories. This makes it a delightful yet indulgent treat that can fit into a balanced diet.
Sugar Content
With about 29 grams of total sugars per serving, this dessert satisfies sweet cravings, but moderation is key. Pairing it with fruits can add fiber and balance the sweetness.
Nutritional Benefits from Ingredients
The star ingredients in our recipe include bananas and low-fat milk, both of which provide essential nutrients:
- Bananas: Rich in potassium and vitamin C, beneficial for heart health and immune support.
- Low-fat Milk: Offers calcium and protein, supporting bone health and muscle recovery.
- Whipped Topping: Adds a creamy texture, though opt for lower sugar options if you prefer.
Enjoying the best banana pudding doesn’t just delight your taste buds; it also nourishes your body! For more insights on health benefits, check out resources from the USDA.
FAQs about the Best Banana Pudding
Can I make banana pudding a day ahead?
Absolutely! Making your best banana pudding a day ahead can enhance the flavors as they meld together. Just be sure to store it in the refrigerator, covered tightly. This allows the layers to soak in, ensuring it’s extra creamy when you’re ready to serve.
How do I store leftover banana pudding?
To keep your banana pudding fresh, transfer any leftovers to an airtight container and store it in the refrigerator. It’s best consumed within 3-4 days, as the bananas may start to brown and the textures can change over time.
Can I use alternative milks in this recipe?
Of course! If you want a dairy-free option, feel free to swap in almond, soy, or oat milk. Just choose an unsweetened variety to keep the sweetness balanced. Your best banana pudding is adaptable, ensuring everyone at your table can enjoy it!
For more tips on storing desserts, check out FoodSafety.gov for the latest guidelines.
Conclusion on the Best Banana Pudding
Recap why homemade banana pudding is worth it!
Homemade banana pudding is truly a delightful treat. Not only is it incredibly easy to whip up—with no cooking required—but the layers of creamy pudding, fresh bananas, and crunchy vanilla wafers create a heavenly combination. By making it yourself, you control the ingredients and ensure it’s bursting with fresh flavor. So, let's celebrate the joy of crafting the best banana pudding that will surely impress your family and friends.
The Best Banana Pudding
Equipment
- large bowl
- whisk
- glass serving bowl
Ingredients
- 2 cups cold milk
- 1 5-ounce package instant vanilla pudding mix
- 1 14-ounce can sweetened condensed milk
- 1 tablespoon vanilla extract
- 1 12-ounce container frozen whipped topping, thawed
- 1 16-ounce package vanilla wafers
- 12 small bananas, sliced or more as needed
Instructions
- Gather all ingredients.
- Place milk and pudding mix in a large bowl; beat with a whisk for 2 minutes. Whisk in condensed milk until smooth.
- Stir in vanilla, then fold in whipped topping.
- Arrange a layer of wafers in the bottom of a glass serving bowl. Top with a layer of banana slices, then a layer of pudding mixture; repeat layers until all ingredients are used.
- For best results, chill pudding in the refrigerator for at least 1 hour before serving. Top with extra crushed wafers just before serving.
- Enjoy!

Leave a Reply