
Introduction to Oreo Protein Balls
The allure of nostalgia and healthy eating
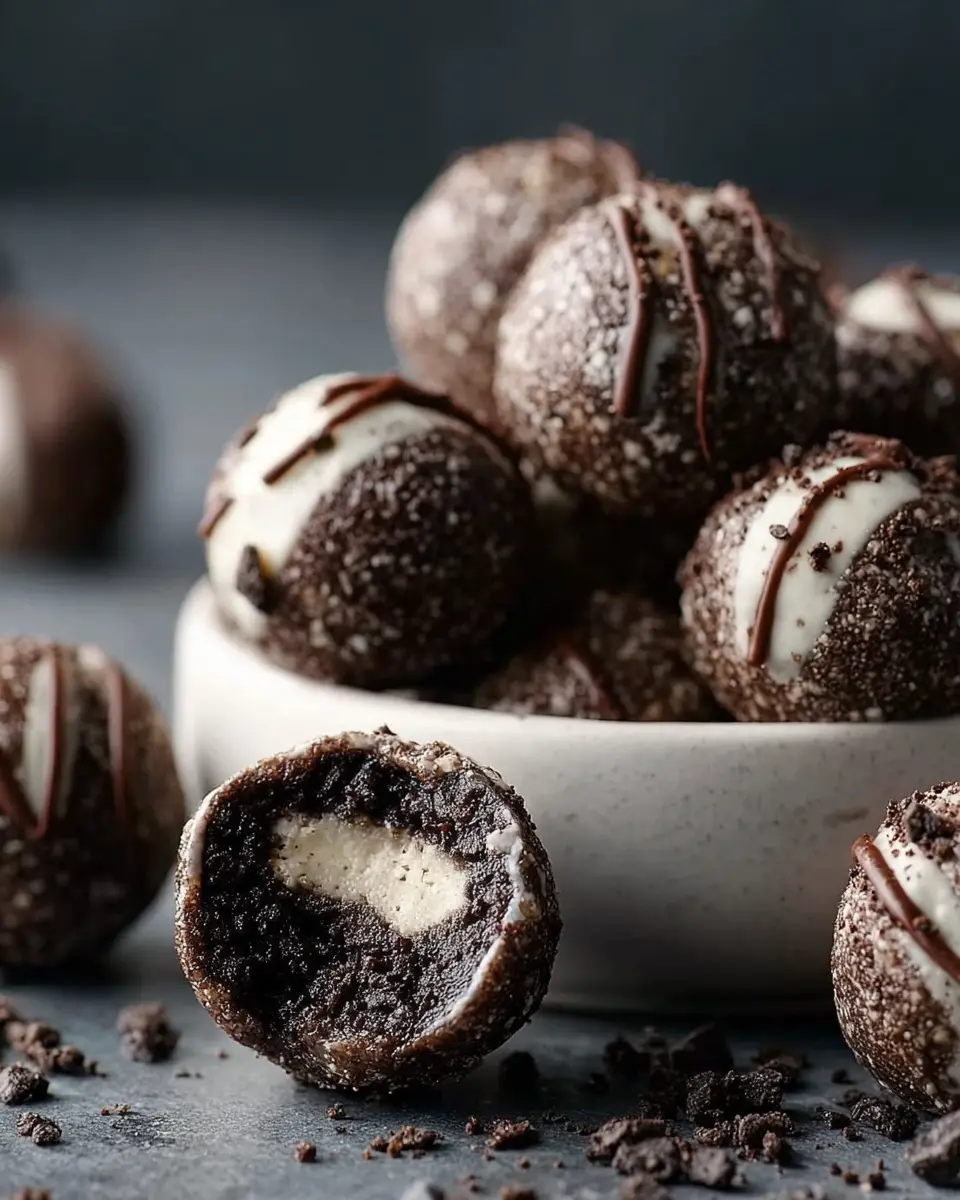
There's no denying the allure of Oreos. For many, biting into that iconic chocolate cookie transports you straight to childhood memories—think after-school snacks, birthday celebrations, or those late-night kitchen raids. Now, imagine capturing that nostalgic flavor in a healthy snack. Sounds enticing, right?
Enter Oreo protein balls—the perfect blend of indulgence and nutrition. These little bites first became a staple in my home when my daughter Raihana needed a quick pick-me-up during exam weeks. She craved something sweet, while I sought a snack that could be prepared in just 10 minutes. Result? A delightful ritual where she'd grab one on her way out, and I’d sneak a couple with my morning coffee.
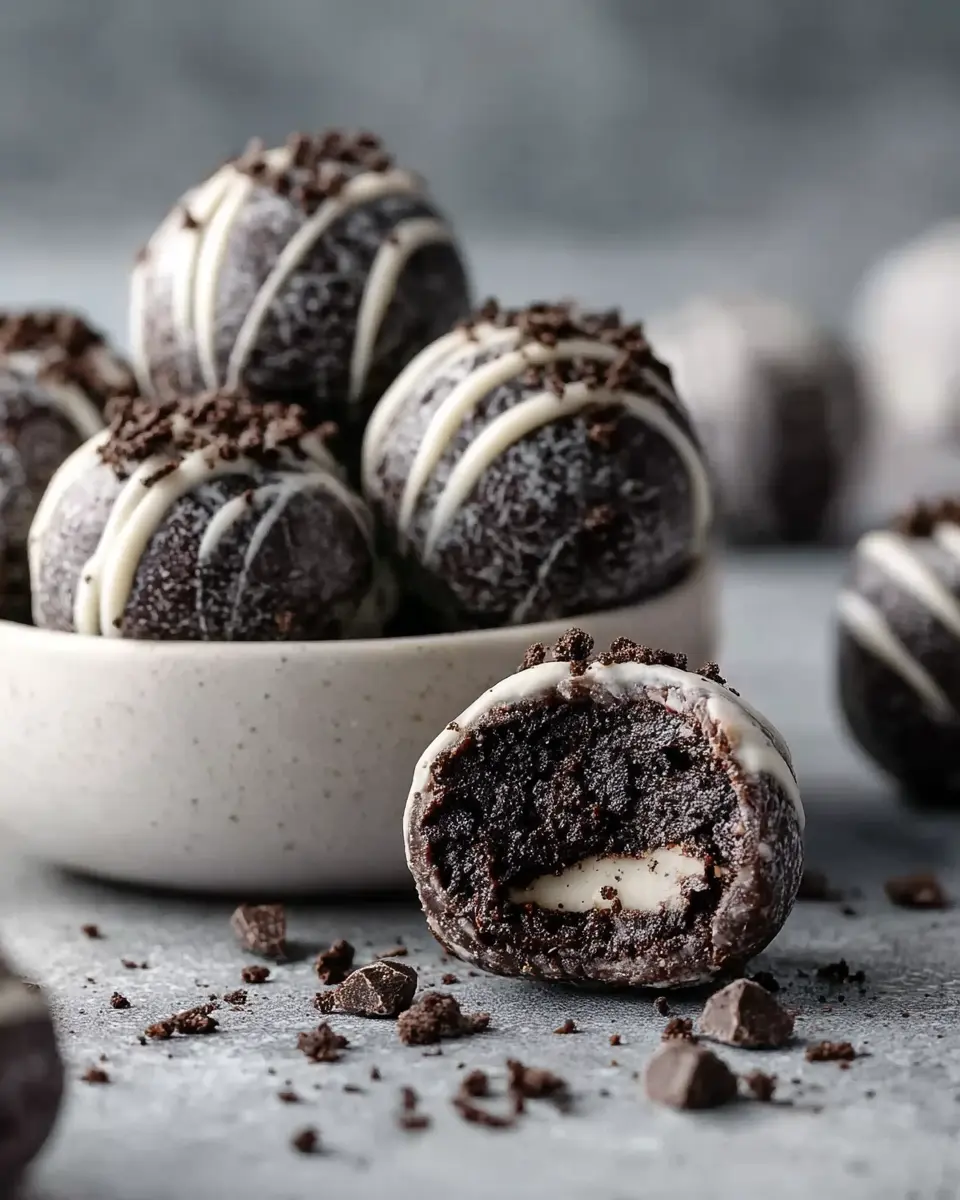
These no-bake energy balls are deceptively simple yet packed with goodness. With a base of wholesome oats and creamy nut butter, they're not just delicious but also provide a nice protein boost. Plus, who wouldn't love the excuse to enjoy something that tastes like dessert while loading up on nutrients?
So whether you’re juggling a busy life, studying for exams, or just craving that cookies-and-cream flavor, these Oreo protein balls are ready to satisfy your taste buds without the guilt.
For more on the health benefits of oats and protein, check out this source.
Ingredients for Oreo Protein Balls
To whip up these delightful Oreo protein balls, you'll want to gather a few simple ingredients that pack both flavor and nutrition. Each element plays a role in recreating that beloved cookies-and-cream taste, while also fueling your body. Here’s a closer look at what you’ll need:
- 1 cup rolled oats: A fiber-rich base that provides energy and helps bind the ingredients.
- ½ cup almond butter (or peanut butter): The nutty goodness adds creaminess and healthy fats.
- ¼ cup honey or maple syrup: For that perfect touch of sweetness, use whichever you prefer.
- ½ cup vanilla protein powder: Boost your protein intake effortlessly with this essential ingredient.
- 6 Oreo cookies, crushed: The star of the show, these cookies bring the iconic flavor we all adore.
- ¼ teaspoon vanilla extract: Enhances the overall taste and adds depth.
- 1–2 tablespoon milk of choice: Adjusts the consistency to create easy-to-roll balls.
- A pinch of salt: A sprinkle can elevate all the flavors.
With these ingredients in hand, you’re ready to embark on your delicious protein snack adventure! If you’re curious about the benefits of oats or the importance of protein in your diet, check out this wellness guide on the benefits of whole grains and protein’s role in muscle recovery to enhance your nutritional knowledge. Happy cooking!
Preparing Oreo Protein Balls
Creating Oreo Protein Balls is not only a fun activity but also a straightforward process that transforms the classic cookie flavor into a healthy on-the-go snack. Follow these essential steps to whip up a batch that’s sure to delight your taste buds while keeping you fueled throughout your day.
Gather and prepare your ingredients
Start by collecting all your ingredients in one place. This will streamline the cooking process and ensure nothing is left out. Here’s what you need:
- 1 cup rolled oats
- ½ cup almond butter (or peanut butter)
- ¼ cup honey or maple syrup
- ½ cup vanilla protein powder
- 6 Oreo cookies, crushed
- ¼ teaspoon vanilla extract
- 1–2 tablespoon milk of choice (if needed for consistency)
- A pinch of salt
Having a clear workspace can also enhance your cooking experience. Feel free to check your pantry for any items you might need, and set out measuring cups and mixing bowls in advance.
Crush the Oreo cookies
Next, it’s time to bring some fun to the kitchen! Place your six Oreo cookies in a zip-top bag and seal it up. Using a rolling pin, crush the cookies until you achieve a delightful mix of crumbs and chunks. This texture will add that classic Oreo crunch to your protein balls, creating a lovely contrast to the chewy oats.
Mix your dry ingredients
In a large mixing bowl, combine your rolled oats, protein powder, and a pinch of salt. Use a whisk or a spoon to mix them well. The dry ingredients come together for that essential base, so make sure they’re evenly distributed. This blend not only provides a nutritious boost but also ensures that the flavors meld beautifully.
Combine the wet ingredients
In another bowl, stir together the almond butter, honey (or maple syrup), and vanilla extract. This step makes sure you get that creamy consistency which adds a delightful richness to the Oreo Protein Balls. Aim for a smooth mixture; if it’s too thick, you can always add a small splash of milk to loosen it up.
Create the protein ball mixture
Now, gently fold the dry mix into the wet mix. Add the crushed Oreos to the bowl and stir until well combined. The goal here is to create a mixture that holds together well. If it feels too dry, this is where that extra milk comes in—just a tablespoon at a time until you reach your desired consistency.
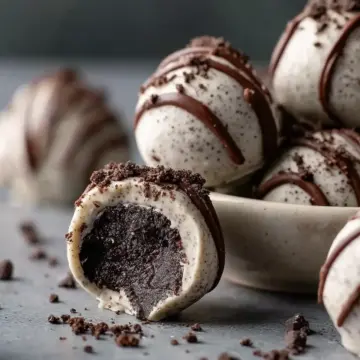
Form and chill the protein balls
Using your hands or a cookie scoop, form the mixture into 1-inch balls. Place them on a lined tray or plate. Once you have them all rolled out, popping them in the fridge for about 15–30 minutes is key. This chilling time helps the balls firm up, making them easier to handle and snack on later.
Congratulations! You’re now ready to enjoy your homemade Oreo Protein Balls, a treat that seamlessly blends indulgence with nutrition. Store leftovers in an airtight container in the fridge for up to a week—if they even last that long! Feel free to explore more snack ideas or protein options to customize this recipe to your taste. Happy snacking!

Variations on Oreo Protein Balls
Different nut butter options
When it comes to making Oreo protein balls, nut butter is your canvas! While almond butter adds a lovely creaminess, you can effortlessly switch it up with other options. Peanut butter is a crowd favorite, offering a richer taste, while cashew butter brings a mild and buttery profile. Sunflower seed butter serves as a great nut-free alternative, and you can experiment with flavors like chocolate or flavored nut butters for a fun twist! Each variation enhances the overall flavor of your protein balls and creates a unique snack experience.
Flavor twists with protein powder
Don’t hesitate to think outside the box with your protein powder! Although vanilla complements the Oreo protein balls beautifully, why not elevate them with cookies & cream or chocolate protein powder? You could even dive into fruity flavors or matcha for an unexpected but delightful twist. Each choice imparts a different taste and nutritional profile, making your snack not only delicious but also tailored to your preferences. Try mixing a few flavors to discover your ultimate combo—you never know what delightful surprise awaits!
For even more ideas, check out NutritionalProtein.com for a guide on protein powder varieties!
Cooking Tips and Notes for Oreo Protein Balls
Creating your Oreo Protein Balls is a delightful experience, but there are a few tips to make the process even smoother:
-
Crushing Oreos: For a better texture, try placing the Oreos in the freezer for a bit before crushing. This helps keep them from turning into dust too quickly. You want those crunchy bits for contrast!
-
Bind it Well: If your mixture feels too dry, don’t hesitate to add a splash more of your milk of choice. It can make all the difference!
-
Flavor Varieties: Experiment with different nut butters like cashew or sun butter for unique flavors. You might find a new favorite twist!
-
Storage Tips: Keep your protein balls in an airtight container in the fridge for up to a week. For longer storage, pop them in the freezer; just thaw them for a few minutes before enjoying.
By following these tips, you'll ensure that your Oreo Protein Balls turn out perfectly every time!
Serving Suggestions for Oreo Protein Balls
When it comes to enjoying your Oreo protein balls, the possibilities are endless! Here are a few fun ideas to elevate your snacking experience:
-
Pair with Fresh Fruits: Enjoy them alongside sliced apples or berries for a well-rounded snack that boosts your energy.
-
Coffee Companion: Crumble an Oreo protein ball over your morning yogurt or mix it into your oatmeal for a delightful twist.
-
Post-Workout Boost: These protein-packed bites make for a perfect recovery snack after a workout. Combine them with a smooth smoothie or protein shake for extra nourishment.
Remember, these little morsels are all about balance and enjoyment, so feel free to get creative! What’s your favorite way to savor them?
Time Breakdown for Oreo Protein Balls
Preparation time
These delicious Oreo Protein Balls come together in a breezy 10 minutes! That’s all the time you need to whip up this quick and satisfying snack.
Chilling time
Once you’ve rolled the mixture into balls, place them in the fridge for 15–30 minutes. This little break helps them firm up nicely for optimal munching.
Total time
In just 25–40 minutes, you're set! You'll have a delicious batch of protein-packed energy bites ready to fuel your day. For more healthy snacks, consider checking out sites like Healthline or EatingWell.
Nutritional Facts for Oreo Protein Balls
Calories per protein ball
Each delicious Oreo protein ball contains approximately 130 calories, making them a guilt-free treat.
Protein content
Packed with around 5 grams of protein per ball, these snacks will help keep you energized and satiated throughout your day.
Key ingredients
These bites feature wholesome ingredients like rolled oats, almond butter, and vanilla protein powder, ensuring you enjoy a nutritious balance while indulging in nostalgic Oreo flavor. For more detailed nutrition information, check out this resource on protein in snacks to better understand how they can fit into your diet.
FAQs about Oreo Protein Balls
Can I substitute ingredients?
Absolutely! If almond butter isn’t your favorite, feel free to swap in peanut butter or even sunbutter for a nut-free version. You can also replace honey with maple syrup for a vegan-friendly option. Experimenting with different protein powders can add a unique twist to your Oreo Protein Balls—try chocolate or even cookies & cream for extra flavor.
How long do these protein balls last?
When stored in an airtight container in the fridge, these Oreo Protein Balls will stay delicious for up to a week. They make for a convenient snack option for busy days or a quick energy boost between meals. To keep them fresh longer, you could even freeze them for up to three months.
Are Oreo Protein Balls gluten-free?
Yes, these Oreo Protein Balls can be gluten-free! Just ensure you use certified gluten-free oats and check that your Oreo cookies are made with gluten-free ingredients. This makes them a delightful treat for anyone watching their gluten intake. If you're looking for additional information on gluten-free diets, check out this helpful guide from the Gluten Intolerance Group.
Conclusion on Oreo Protein Balls
In summary, Oreo protein balls offer a delightful blend of indulgence and nutrition, making them a fantastic snack option for any time of day. Whip them up in just 10 minutes and store them for those busy moments. Give them a try, and let this nostalgic treat enhance your snack game!
Oreo Protein Balls
Equipment
- mixing bowl
- rolling pin
- Zip-top bag
- cookie scoop
- Tray or plate
Ingredients
- 1 cup rolled oats
- ½ cup almond butter (or peanut butter)
- ¼ cup honey or maple syrup
- ½ cup vanilla protein powder
- 6 cookies Oreo cookies, crushed
- ¼ teaspoon vanilla extract
- 1–2 tablespoon milk of choice (if needed for consistency)
- a pinch salt
Instructions
- Crush the Oreos. Place the cookies in a zip-top bag and use a rolling pin to crush them into small pieces. You want a mix of crumbs and small chunks for texture.
- Mix the dry ingredients. In a large mixing bowl, combine the rolled oats, protein powder, and a pinch of salt. Stir well.
- Add the wet ingredients. Stir in the almond butter, honey (or maple syrup), and vanilla extract. Mix until mostly combined. Add the crushed Oreos and gently fold them in.
- Check the texture. The mixture should hold together when pressed. If it feels too dry or crumbly, add 1 tablespoon of milk at a time until you reach the right consistency.
- Roll into balls. Use your hands or a cookie scoop to form 1-inch balls. Place them on a lined tray or plate.
- Chill and enjoy. Refrigerate for 15–30 minutes to firm up. Store leftovers in an airtight container in the fridge for up to a week.

Leave a Reply