
Introduction to Santa’s Trash Cookie Bars
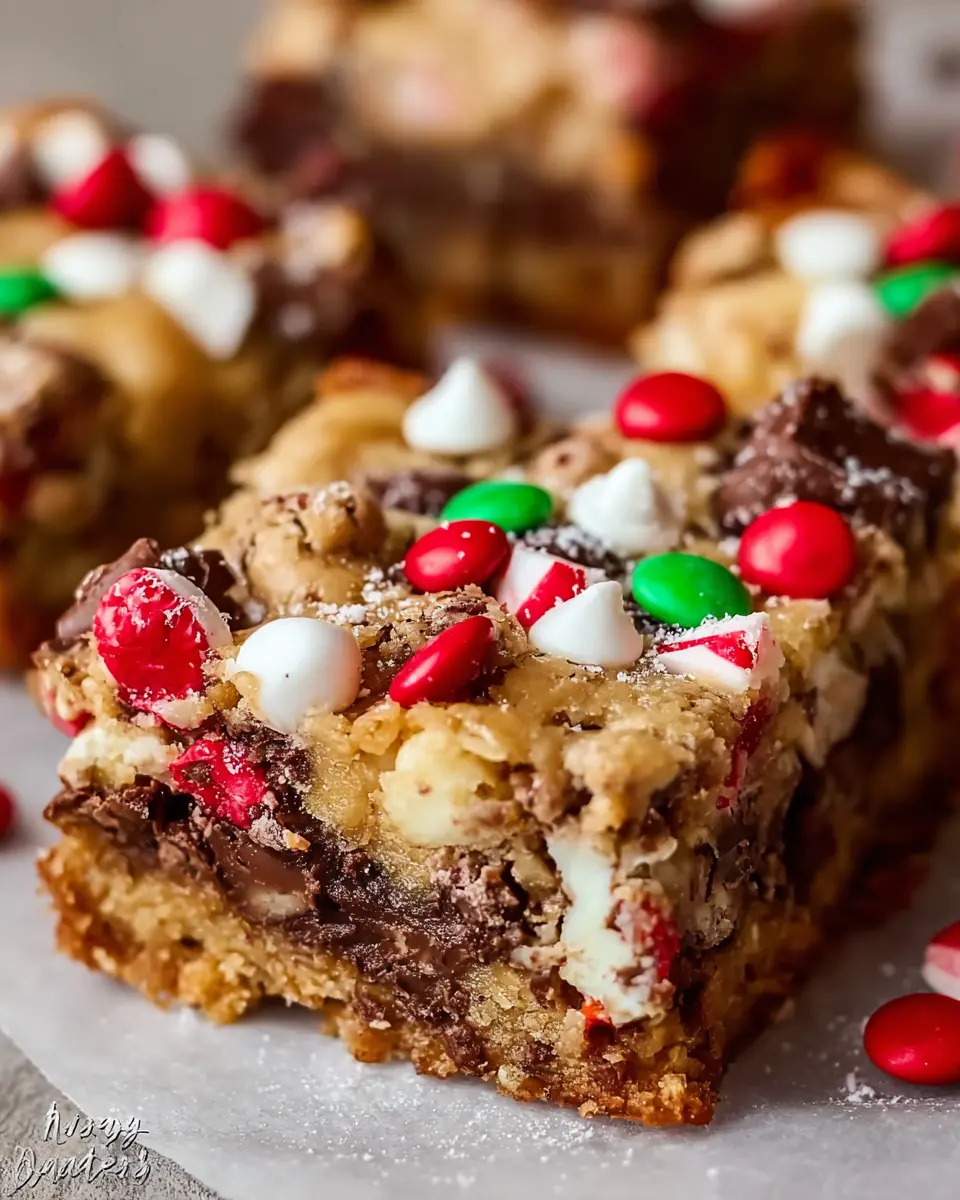
If you’re on the hunt for a festive treat that combines all the best holiday flavors, look no further than Santa’s Trash Cookie Bars! These bars are not just another dessert; they embody the spirit of the season. With layers of sweet and salty goodness—including chocolate chips, colorful holiday candies, and crunchy pretzels—each bite is a delightful surprise.
Why Santa’s Trash Cookie Bars are a holiday favorite?
These cookie bars are super easy to make, which means you can whip them up in no time—perfect for impromptu gatherings or cozy nights in. The combination of ingredients allows you to get creative; feel free to switch out M&M’s for your favorite candy-coated chocolates or add a sprinkle of nuts for some extra crunch. I often find myself reminiscing about the joy of baking during this time of year, as the sweet aroma fills the air and brings loved ones together around the kitchen.
Because they combine sweetness with a touch of salt, these bars are undeniably more than just good—they’re a holiday tradition waiting to happen. So grab your mixing bowl and let’s dive into making these deliciously festive treats together!
Ingredients for Santa’s Trash Cookie Bars
Creating your own Santa’s Trash Cookie Bars is as much fun as it is delicious! This recipe requires a delightful mix of simple ingredients, bringing together flavors and textures that are sure to impress. Here’s what you’ll need:
- 1 cup unsalted butter (melted) - This adds richness and helps bind everything together.
- 1 cup brown sugar (packed) - For that lovely caramel flavor.
- ½ cup granulated sugar - To balance the sweetness.
- 2 large eggs (room temperature) - Essential for achieving the perfect consistency.
- 2 teaspoons vanilla extract - A hint of warmth that makes everything better.
- 2 ½ cups all-purpose flour - This forms the base of your bars.
- 1 teaspoon baking soda - Ensures your bars rise nicely.
- ½ teaspoon salt - Enhances all the sweet flavors.
- 1 cup chocolate chips - Because it’s hard to have too much chocolate!
- ½ cup white chocolate chips - Adds a creamy contrast.
- ½ cup crushed pretzels - For that perfect salty crunch.
- ½ cup holiday M&M’s or candy-coated chocolates - To brighten up your bars.
- ½ cup chopped caramel candies - A gooey treat that melts in your mouth.
- ¼ cup toffee bits - For an extra sweet crunch.
- ¼ cup chopped nuts (optional) - You can use your favorite type, like almonds or pecans.
- ¼ cup sprinkles - A festive finishing touch!
Feeling inspired? Go ahead and gather your ingredients to start your baking journey! You’ll find that mixing and matching these components adds a personal touch to the Santa’s Trash Cookie Bars, making them a holiday favorite. For additional inspiration, check out this guide on baking tips for beginners to elevate your kitchen skills!
Preparing Santa’s Trash Cookie Bars
Baking is often about gathering moments and indulging in delicious treats, and Santa’s Trash Cookie Bars are no exception! Whether you’re hosting a holiday party or just want to make some sweet memories with friends and family, these bars are sure to please. Let’s break down the steps to prepare these scrumptious cookie bars.
Gather your ingredients
Before diving into the mixing bowl, it’s essential to have all your ingredients on hand. This not only streamlines the process but also ensures you won’t miss a vital component. For Santa’s Trash Cookie Bars, you'll need:
- 1 cup unsalted butter (melted)
- 1 cup brown sugar (packed)
- ½ cup granulated sugar
- 2 large eggs (room temperature)
- 2 teaspoons vanilla extract
- 2 ½ cups all-purpose flour
- 1 teaspoon baking soda
- ½ teaspoon salt
- Tasty add-ins like chocolate chips, crushed pretzels, holiday M&M’s, caramel candies, toffee bits, and sprinkles.
For additional inspiration, check out this Essential Baking Guide to ensure you have the best ingredients for your baking adventure!
Mix the wet ingredients
Start by mixing the melted butter, brown sugar, and granulated sugar in a large bowl. Aim for a smooth, creamy texture – it should have a light golden color. Next, incorporate the eggs one at a time, mixing well after each addition. Finally, add in the vanilla extract; it adds that delightful aromatic quality we all cherish in baked goods.
Combine dry ingredients
In another bowl, whisk together the flour, baking soda, and salt. This step may seem simple but is critical for achieving the right texture. Combining the dry mix separately ensures an even distribution of the leavening agent (baking soda) throughout the dough, which is key to the perfect rise in your Santa’s Trash Cookie Bars.
Fold in the fun add-ins
Now for the fun part! Gently fold the dry ingredients into the wet mixture until just combined. Avoid overmixing to keep your cookie bars soft and chewy. Then, it’s time to stir in all the fun add-ins: chocolate chips, crushed pretzels, M&M’s, caramel, toffee bits, and sprinkles. It’s like a festive party in your bowl!
Spread and bake the cookie bars
When everything is nicely mixed, spread the dough into a lined 9x13 inch pan. Make sure to evenly distribute the topping choices, pressing them slightly into the dough to avoid burning. Bake these beauties at 350°F (175°C) for about 25 to 30 minutes. You want the edges to be golden and the center to be just slightly soft – trust us, it’ll set perfectly as it cools.
Once cooled, slice and serve these delightful Santa’s Trash Cookie Bars to family and friends. It’s a festive treat that encourages sharing and laughter, just like the magic of the holiday season!
Variations on Santa’s Trash Cookie Bars
Gluten-Free Versions
Who says you have to miss out on Santa’s Trash Cookie Bars if you’re gluten-intolerant? Substitute the all-purpose flour with a gluten-free blend to keep the texture and flavor intact. Brands like Bob's Red Mill or King Arthur Flour have excellent options. You can also make a delicious almond flour version for a nutty twist!
Seasonal Adaptations
Feel like mixing things up? Customize Santa’s Trash Cookie Bars for different holidays! Try adding pumpkin spice or dried cranberries for a festive autumn treat, or sprinkle in red and green candies for a Christmas flair. Don’t hesitate to get creative with the mix-ins based on what’s in season or what you have on hand. What holiday will you celebrate with these delicious bars?
Baking notes for Santa’s Trash Cookie Bars
Tips for achieving the perfect texture
To create the ideal Santa’s Trash Cookie Bars, focus on achieving a balance between chewy and crunchy. Make sure not to overmix when combining wet and dry ingredients, as this can lead to tough bars. Keeping a slightly soft center allows for that gooey texture that makes these bars so irresistible. When baking, don't forget to rely on the golden edges as your cue—this means you're on the right track!
Avoiding common baking mistakes
Be mindful of measurement mistakes; using packed brown sugar versus granulated sugar can alter sweetness levels. Also, always allow your bars to cool completely before slicing for clean, neat pieces. Lastly, keep an eye on baking times—every oven is different, and overbaking can steal that soft center you’re aiming for. If you want to dive deeper into baking techniques, check out sources like the King Arthur Baking Company for expert tips!
Serving suggestions for Santa’s Trash Cookie Bars
Creative ways to present the bars
Elevate your Santa’s Trash Cookie Bars presentation by cutting them into festive shapes using cookie cutters, perfect for holiday gatherings. Arrange the bars on a decorative platter and sprinkle a dusting of powdered sugar on top for a snowy effect, or drizzle some melted chocolate for an added touch of decadence. Wrapping them individually in clear cellophane with a colorful ribbon can also make for charming holiday gifts!
Pairing ideas for a sweet snack platter
For a delightful snack platter featuring your Santa’s Trash Cookie Bars, consider adding complementary treats. Mini peppermint bark, chocolate-covered pretzels, or even some fruit slices like strawberries and apple wedges can balance the sweetness. A cozy mug of hot chocolate or spiced apple cider on the side enhances the seasonal flavor, creating a perfect pairing. Your guests will savor every bite!
For more festive serving ideas, check out Food Network's Holiday Dessert Inspirations to inspire your gathering!
Time details for Santa’s Trash Cookie Bars
Preparation time
Get started on these delightful bars with a quick 15 minutes of prep. This includes all the mixing and preparation to bring your cookie bar dreams to life!
Baking time
Once you've assembled your ingredients, pop your creation into the oven and bake for 30 minutes. Watch as they turn golden and delicious!
Total time
In just 45 minutes, you’ll have a batch of Santa’s Trash Cookie Bars ready to share (or indulge in yourself!). Perfect for festive gatherings or cozy nights in. For more fun recipes, check out this comprehensive dessert guide.
Nutritional Information for Santa’s Trash Cookie Bars
When indulging in Santa’s Trash Cookie Bars, it’s good to know what you’re treating yourself to. Each bar packs a delightful mix of flavors with the following nutritional benefits:
- Calories: 320 per bar
- Sugar Content: 24 grams of pure sweetness
- Protein: 4 grams to help round out your dessert experience
Feeling festive? These bars are a sweet treat that you can enjoy while balancing your holiday festivities. Want to learn more about nutrition? Check out the USDA’s FoodData Central for detailed food composition information. Remember, everything in moderation is key, and these cookie bars make the perfect festive indulgence!
FAQs about Santa’s Trash Cookie Bars
Can I customize the mix-ins?
Absolutely! One of the best things about Santa’s Trash Cookie Bars is their versatility. Feel free to swap out the chocolate chips for butterscotch or peanut butter chips, or substitute the holiday M&Ms with your favorite seasonal candies. You can even add dried fruits like cranberries or apricots for a chewy texture. The only limit is your imagination!
How do I store the cookie bars?
To keep your Santa’s Trash Cookie Bars fresh, store them in an airtight container at room temperature for up to a week. If you want to keep them longer, you can freeze them! Just wrap each bar tightly in plastic wrap and then place them in a freezer-safe bag. Thaw at room temperature before enjoying.
What if I have dietary restrictions?
No problem! You can easily make adjustments to suit your dietary needs. Consider using gluten-free flour for a gluten-free version or substituting the butter with coconut oil for a dairy-free option. If you're looking for a low-sugar alternative, you can find sugar substitutes that work well in baking. Always check ingredient labels to ensure compatibility with your specific dietary requirements.
Conclusion on Santa’s Trash Cookie Bars
These Santa’s Trash Cookie Bars are more than just a treat; they’re an irresistible combination of flavors and textures that embody the spirit of the holiday season. Quick to make and delightful to share, they’re a festive must-have. Bake a batch and watch everyone’s faces light up!
Santa’s Trash Cookie Bars
Equipment
- 9x13-inch pan
- mixing bowls
- whisk
Ingredients
Wet Ingredients
- 1 cup unsalted butter melted
- 1 cup brown sugar packed
- ½ cup granulated sugar
- 2 large eggs room temperature
- 2 teaspoons vanilla extract
Dry Ingredients
- 2 ½ cups all purpose flour
- 1 teaspoon baking soda
- ½ teaspoon salt
Mix-Ins
- 1 cup chocolate chips
- ½ cup white chocolate chips
- ½ cup crushed pretzels
- ½ cup holiday M&M’s or candy coated chocolates
- ½ cup chopped caramel candies
- ¼ cup toffee bits
- ¼ cup chopped nuts optional
- ¼ cup sprinkles
Instructions
Baking Instructions
- Preheat oven to 350°F (175°C) and line a 9×13 inch pan with parchment paper.
- Mix melted butter, brown sugar, and granulated sugar until smooth.
- Add eggs one at a time then mix in vanilla extract.
- Whisk flour, baking soda, and salt in a separate bowl.
- Gradually combine dry ingredients into wet mixture without overmixing.
- Fold in chocolate chips, pretzels, candies, caramel, and mix-ins.
- Spread dough evenly into prepared pan.
- Add extra toppings and gently press them in.
- Bake for 25 to 30 minutes until edges are golden and center is slightly soft.
- Cool completely before slicing and serving.


Leave a Reply