
Introduction to Gluten Free Thumbprint Cookies
The Appeal of Gluten Free Treats
Have you ever craved a nostalgic cookie but found yourself avoiding gluten? You're not alone! Many people are transitioning to a gluten-free lifestyle, whether for health reasons or dietary preferences. This is where gluten free thumbprint cookies shine, effortlessly satisfying your sweet tooth while keeping it gluten-free.
The charm of these delightful cookies lies in their simplicity. They feature a buttery base that is both tender and chewy, filled with your favorite jam. Not only are they a fantastic choice for gatherings or cookie platters, but they also create a warm, inviting atmosphere in your kitchen as they bake. The alluring aroma of sweet cookies wafting through the air will surely make anyone nearby want to join in the fun.
What makes gluten free thumbprint cookies even more appealing is how easy they are to make! With common pantry staples, you can whip up a batch in no time. If you're interested in a little more inspiration, check out Delish or Well Plated for additional gluten-free recipes and tips.
In our upcoming sections, we'll take a closer look at the ingredients, step-by-step instructions, and tips for achieving cookie perfection!
Ingredients for Gluten Free Thumbprint Cookies
Creating gluten free thumbprint cookies is a delightful process when you have all the right ingredients at hand. Let’s break down the essentials you’ll need, making your baking experience smooth and enjoyable!
Wet Ingredients
- ½ cup unsalted butter – The foundation of our cookies, lending them a rich and buttery flavor.
- ¼ cup white sugar – This adds sweetness and helps the cookies achieve a golden color.
- ¼ cup brown sugar – For that caramel-like depth of flavor that pairs wonderfully with the jam.
- 1 egg yolk – This gives structure and moisture while keeping the cookies soft.
- 1 teaspoon vanilla extract – A must for an aromatic touch that enhances all the flavors.
Dry Ingredients
- 1 ½ cups gluten free all-purpose baking flour – Be sure to use a reliable blend like Bob's Red Mill or King Arthur; this is key for texture.
- ¼ teaspoon salt – Just a pinch to balance the sweetness of the sugars.
Other Essentials
- ¼ cup white sugar for rolling – This creates a slightly crispy exterior.
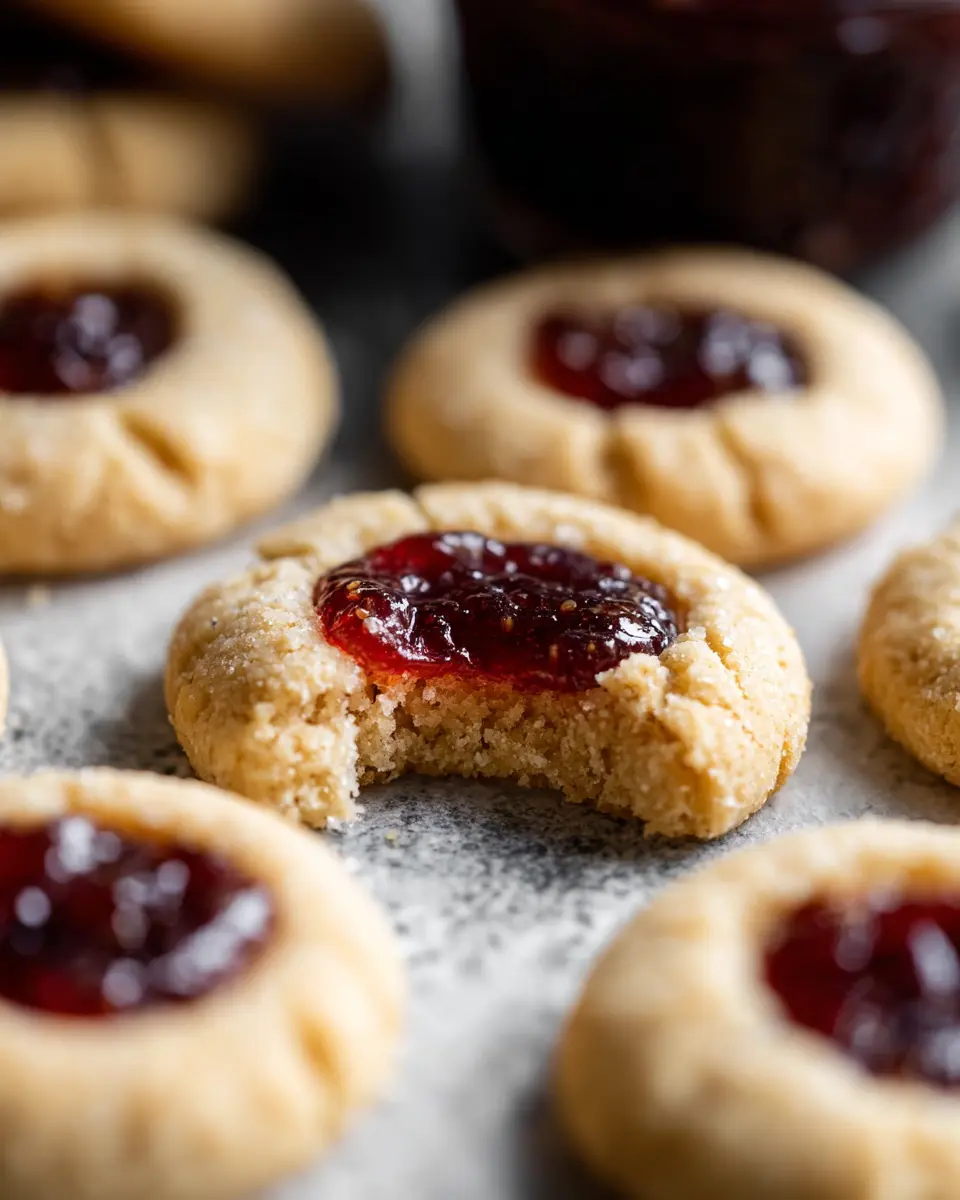
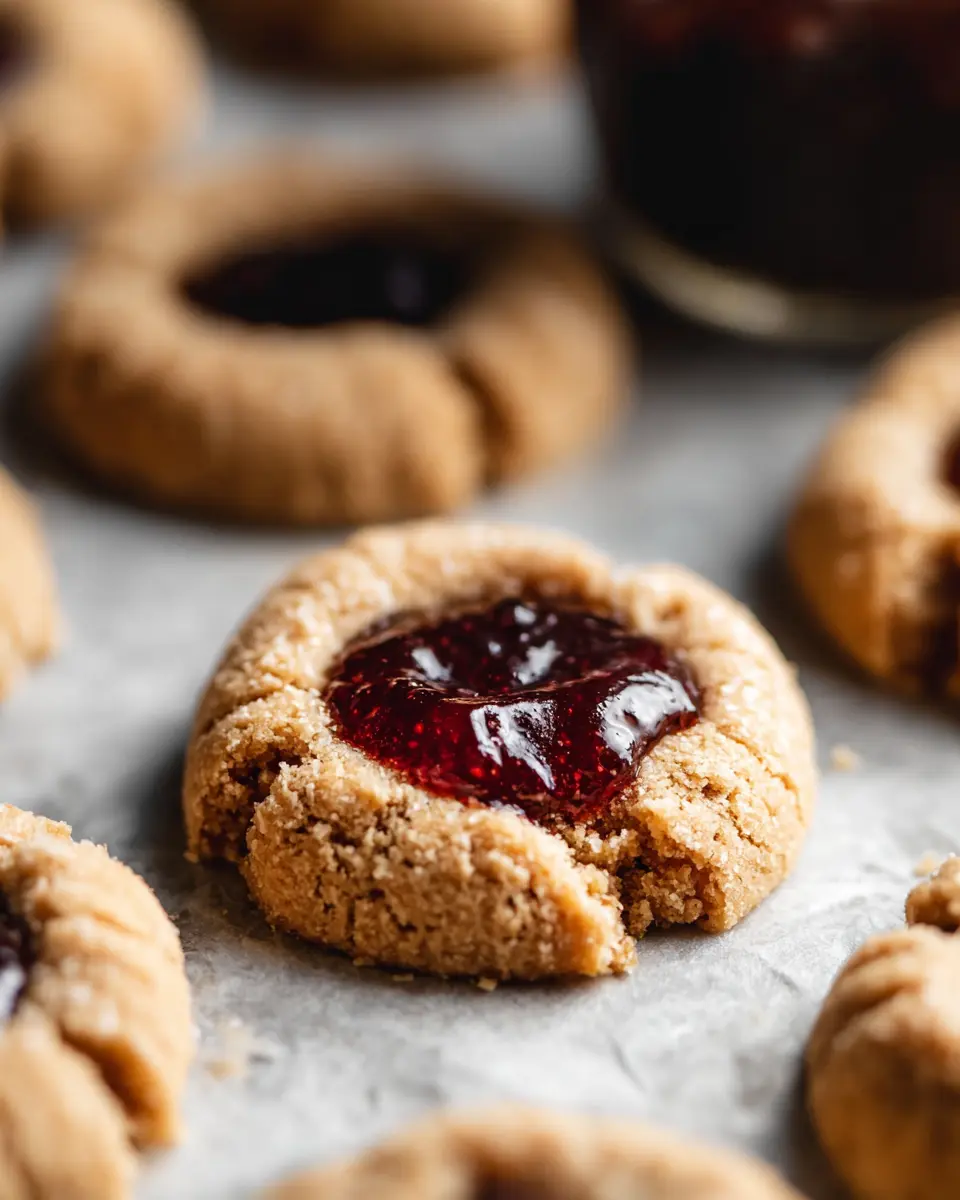
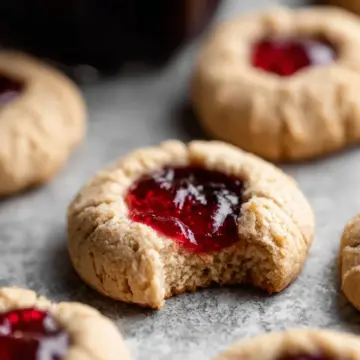
- ⅓ cup raspberry jam or jam of your choice – The filling that adds a burst of fruity goodness to each bite!
With these wholesome ingredients, you’re on your way to baking beautiful cookies that everyone will love. Enjoy the process and savor the delicious results!
Step-by-step preparation for Gluten Free Thumbprint Cookies
Making gluten free thumbprint cookies at home is a delightful activity that transforms your kitchen into a cozy bakery. Follow these simple steps to create a batch of buttery, soft cookies filled with your favorite jam. Let’s jump right in!
Gather your ingredients
Before you get started, it's important to have all your ingredients ready. Here’s what you’ll need:
-
Wet Ingredients:
-
½ cup unsalted butter
-
¼ cup white sugar
-
¼ cup brown sugar
-
1 egg yolk
-
1 teaspoon vanilla extract
-
Dry Ingredients:
-
1 ½ cups gluten free all-purpose baking flour
-
¼ teaspoon salt
-
Other:
-
¼ cup white sugar (for rolling)
-
⅓ cup raspberry jam or jam of your choice
Having everything prepared will make the process smoother!
Mix the wet ingredients
In a medium-sized mixing bowl—or better yet, the bowl of your stand mixer—combine the unsalted butter, white sugar, and brown sugar. Use an electric mixer to beat them together for about one minute until the mixture is smooth and creamy. Next, add the egg yolk and vanilla extract, beating until everything is well-mixed. This creamy mixture is crucial for the rich taste of your cookies.
Combine dry ingredients
In a separate bowl, mix the gluten-free all-purpose baking flour and salt. I recommend using a reliable option like Bob's Red Mill 1:1 baking flour or King Arthur Flour for the best texture. Gradually add this dry mixture to your wet ingredients. Beat until just combined—overmixing can lead to tough cookies!
Form the cookie dough
Using a small cookie scoop (approximately 1 tablespoon), scoop the cookie dough and roll it into balls. Give them a light roll in the ¼ cup of white sugar to coat them nicely. Place each ball on a lined baking sheet, making sure to leave some space between them, as they’ll spread slightly while baking.
Indent and chill the cookies
Press down gently on each cookie ball to flatten them slightly. Now comes the fun part: take the back of a teaspoon and press into the center of each cookie to create an indent. This is where the jam will go! After that, it’s a good idea to chill the cookies in the refrigerator for at least one hour. Chilling helps them maintain their shape during baking.
Bake to perfection
Preheat your oven to 350°F toward the end of your chilling time. Once the cookies are ready, pop them in the oven and bake for about 12-14 minutes or until the edges are lightly golden brown. If your indent has filled in slightly during baking, you can reshape it with your teaspoon. Finally, fill each indent with about a teaspoon of raspberry jam before letting the cookies cool down. Enjoy the delicious aroma filling your kitchen!
Making these gluten free thumbprint cookies is not only easy, but they are also sure to impress friends and family alike. Perfect for cookies platters or as a sweet treat for yourself!
Variations on Gluten Free Thumbprint Cookies
When it comes to gluten free thumbprint cookies, the possibilities are endless! Here are a couple of delightful variations to mix things up.
Thumbprints with Different Jams
While raspberry jam is a classic, feel free to experiment! Try filling your cookies with strawberry, apricot, or even a zesty lemon curd. Each jam brings a unique flavor profile that can elevate these cookies to new heights. Don't be afraid to get creative; personalized flavors can add a special touch to your baking.
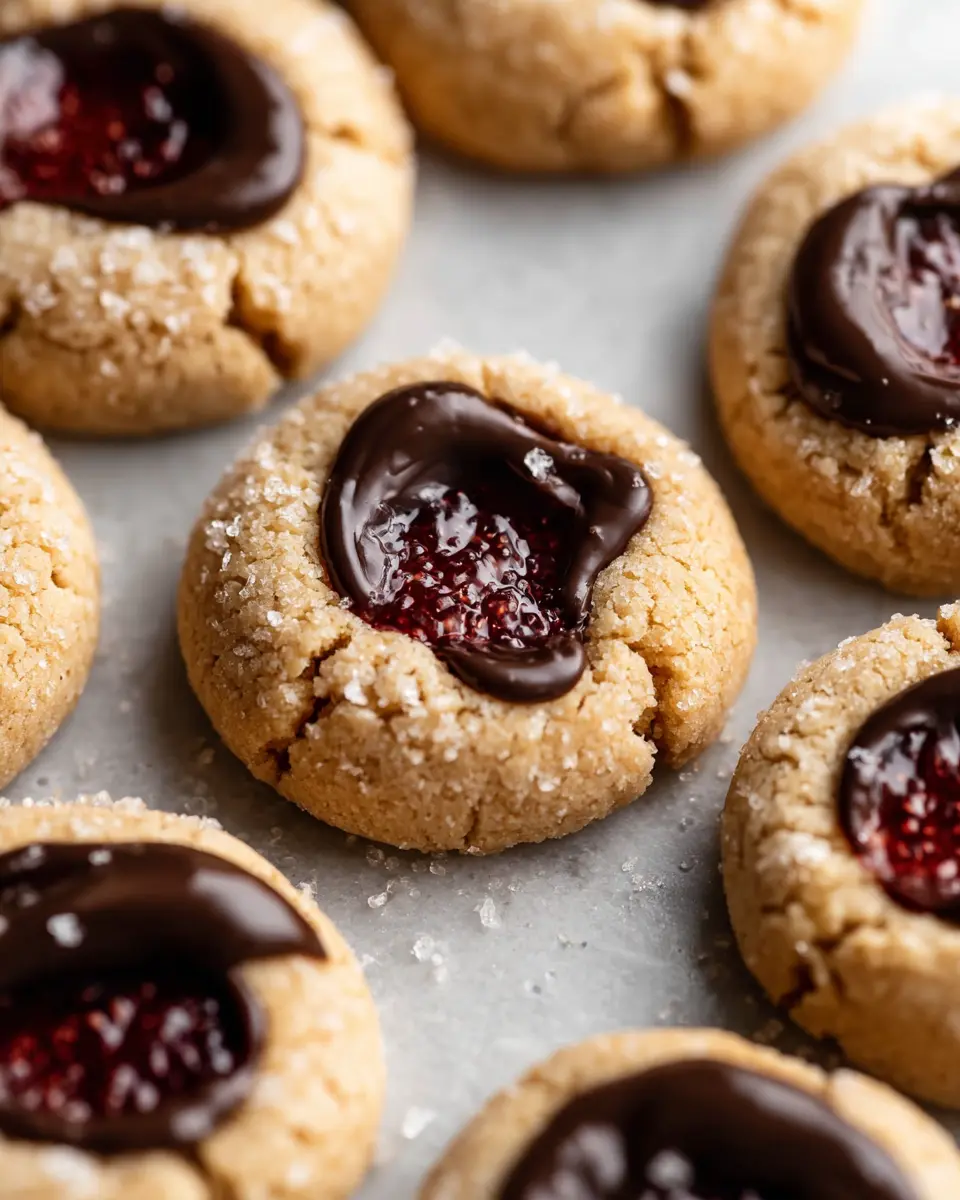
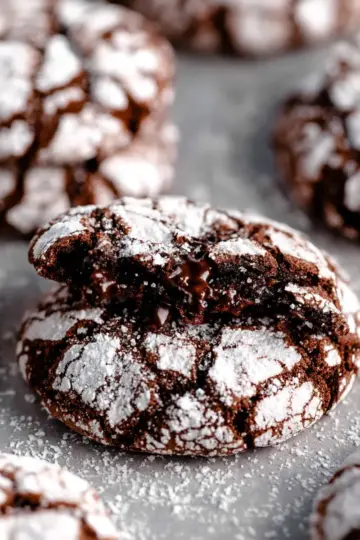
Chocolate Thumbprint Cookies
If you’re a chocolate lover, these cookies are a must-try! Simply replace a portion of the gluten free flour with unsweetened cocoa powder to create a rich, chocolatey base. Fill them with chocolate ganache or your favorite chocolate spread for a truly indulgent treat. Perfect for satisfying any sweet tooth!
Explore more variations and let your taste buds guide you!
Cooking Tips and Notes for Gluten Free Thumbprint Cookies
Best Practices for Gluten Free Baking
When making gluten free thumbprint cookies, ensure you measure your flour by spooning it into the cup and leveling it off. This prevents it from being too packed and helps your cookies stay soft and tender. Don’t skip the chilling step; it's crucial for achieving the right texture!
Common Pitfalls to Avoid
One common mistake is overmixing the dough, which can lead to tough cookies. Be gentle while combining your ingredients! Another pitfall is neglecting the type of jam used. Choose high-quality jam to really elevate your cookies. If you’re unsure about gluten-free flour brands, consider options like Bob's Red Mill or King Arthur, both recommended for superb results.
Serving suggestions for Gluten Free Thumbprint Cookies
Perfect pairings with coffee or tea
If you’re enjoying these gluten free thumbprint cookies with a warm beverage, consider a smooth cup of freshly brewed coffee or a soothing herbal tea. The nutty flavors of a medium roast coffee or a rich Earl Grey tea perfectly complement the sweetness of the cookies. Feeling adventurous? Try pairing them with a chai latte for a spice-infused experience that enhances the fruity jam in the center!
Display ideas for festive occasions
For those special gatherings, consider showcasing your gluten free thumbprint cookies on a tiered cake stand or decorative platter. Add some greenery or colorful sprinkles around the cookies to create a vibrant, festive atmosphere. You could even personalize each cookie by using different jams, turning your cookie display into a delightful and colorful sweet table centerpiece. Your guests will surely be inspired to take a bite!
Check out more creative ideas at Pinterest for putting together a beautiful dessert table.
Time breakdown for Gluten Free Thumbprint Cookies
Preparation time
Getting started on your gluten free thumbprint cookies is a breeze with just 15 minutes needed for preparation. You'll be mixing, scooping, and rolling your dough in no time!
Baking time
Once your dough is ready, the baking process takes about 15 minutes. Keep an eye on those edges; you want them perfectly golden!
Total time
Including the chill time and baking, you're looking at a total of 1 hour and 30 minutes from start to finish. It's a small investment for a batch of delicious cookies that everyone will love!
Nutritional Facts for Gluten Free Thumbprint Cookies
Calories per cookie
Each delightful gluten free thumbprint cookie contains approximately 159 calories. This makes them a sweet treat that's easy to enjoy without straying too far from your dietary goals.
Key nutrients to note
These cookies are not just tasty; they're also a source of essential nutrients. Here are some key highlights:
- Carbohydrates: 24g, providing the energy boost you need throughout the day.
- Protein: 2g, helping to keep you fuller longer.
- Fats: 7g, including healthy fats that are beneficial for your body.
- Fiber: 1g, aiding digestion and promoting a healthy gut.
If you want to explore more about balanced eating, check out this guide on essential nutrients by the USDA. It’s a fantastic resource for anyone looking to enhance their nutritional knowledge!
FAQs about Gluten Free Thumbprint Cookies
Can I make these cookies vegan?
Absolutely! To make gluten free thumbprint cookies vegan, substitute the unsalted butter with coconut oil or a vegan butter alternative, and use a flaxseed or chia seed egg as a binding agent. Simply mix one tablespoon of either seed with three tablespoons of water, let it sit for a few minutes to thicken, and voilà—your egg substitute is ready!
What is the best gluten free flour to use?
For gluten free thumbprint cookies, I recommend using a gluten-free all-purpose flour blend that includes xanthan gum. Popular choices include Bob's Red Mill 1:1 or King Arthur Gluten-Free Baking Mix. Just remember to scoop and level the flour rather than dipping your measuring cup directly into the bag to ensure accuracy!
How should I store my thumbprint cookies?
To keep your cookies fresh, store them in an airtight container at room temperature for up to a week. If you want to prolong their freshness, you can freeze them for up to three months! Just remember to label and date the container, so you won’t forget about your delightful stash of gluten free thumbprint cookies!
Conclusion on Gluten Free Thumbprint Cookies
In summary, these gluten free thumbprint cookies are a delightful treat that brings joy to any occasion. With their buttery texture and sweet jam filling, they're not only easy to make but also a great way to impress friends and family. So grab your ingredients and enjoy baking!
Gluten Free Thumbprint Cookies
Equipment
- baking sheet
- parchment paper
- electric mixer
- teaspoon
- cookie scoop
Ingredients
Wet
- 0.5 cup unsalted butter
- 0.25 cup white sugar for mixing
- 0.25 cup brown sugar for mixing
- 1 each egg yolk
- 1 teaspoon vanilla extract
Dry
- 1.5 cups gluten free all purpose baking flour
- 0.25 teaspoon salt
Other
- 0.25 cup white sugar for rolling
- 0.33 cup raspberry jam or jam of choice
Instructions
Instructions
- Line a baking sheet with parchment paper and set aside.
- In a medium mixing bowl or bowl of a stand mixer, combine the butter, white sugar and brown sugar and beat with an electric mixer for about 1 minute.
- Add in the egg yolk and vanilla and beat to combine. Beat in the flour and salt until combined.
- Use a small cookie scoop, about 1 tablespoon, and scoop into balls. Roll in the sugar and place on the baking sheet, leaving a bit of space between each cookie.
- Press down slightly, then take the back of 1 teaspoon and press an indent in the center of each cookie.
- Place in the fridge to set for 1 hour.
- Toward the end of the hour, preheat the oven to 350 degrees Fahrenheit.
- Once preheated, bake the cookie for 12-14 minutes or until the edges are lightly golden brown. If the indents have filled in at all, you can reform lightly with the teaspoon, then take about 1 teaspoon of jam to fill in each cookie. Let cool to allow them to firm up, then enjoy!
Leave a Reply