
Introduction to Amazing 1-Day Sourdough Sandwich Bread Soft
Why the Rise of Homemade Sourdough Bread?
In recent years, homemade sourdough bread has gained a loyal following, and it’s easy to see why. People are diving back into baking, seeking comfort during challenging times, while also embracing the health benefits of homemade foods. According to a survey by the American Bakers Association, more than 60% of Americans now prefer homemade bread over store-bought options. This trend has sparked a passion for creating the perfect loaf right in your own kitchen.
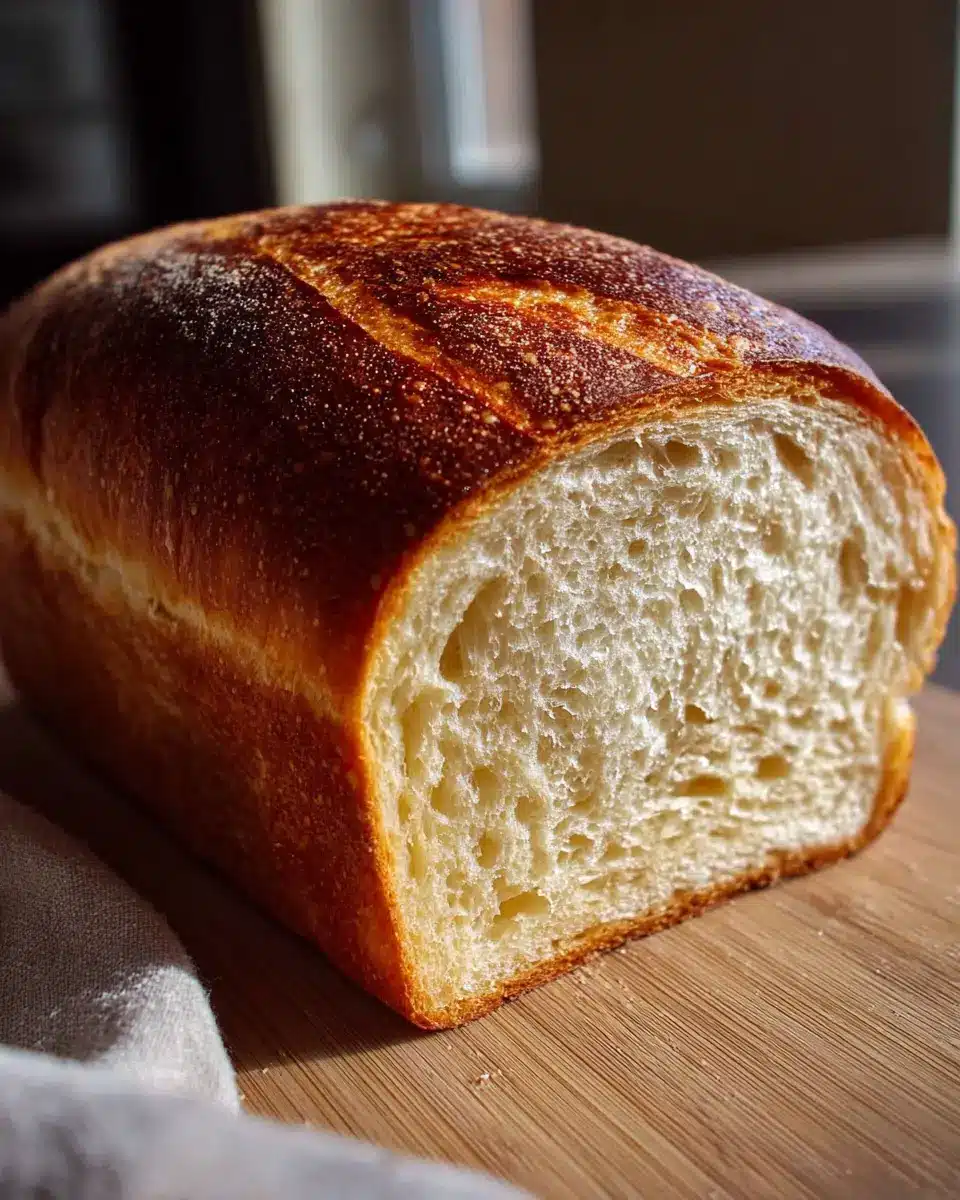
The amazing 1-day sourdough sandwich bread soft recipe simplifies the traditional sourdough process, making it accessible to everyone, even beginners. Chances are, you’re looking for a bread that not only tastes fantastic but also holds up well for everyday sandwiches and toasts. This bread's delightful texture and flavor will surpass anything you can find at a grocery store.
Crafting bread builds a sense of connection—both to your food and to your roots. Plus, baking bread can be incredibly therapeutic! So, if you've ever wanted to experiment with sourdough but felt intimidated by the process, this recipe is here to take you from novice to pro. Grab your ingredients, and let’s create something fantastic!
For more baking tips and tricks, check out resources like King Arthur Baking and The Perfect Loaf.
Ingredients for Amazing 1-Day Sourdough Sandwich Bread
Essential ingredients for perfect sourdough
Ready to whip up some amazing 1-day sourdough sandwich bread soft enough to elevate your sandwiches? Let’s dive into the essential ingredients that will make this recipe a success!
- Active Sourdough Starter (100g): This is the magic behind that delightful sourdough flavor. Ensure it's bubbly and active, as this will help the bread rise beautifully.
- Warm Water (350g): The ideal temperature for your water is around 85°F. This warmth activates the yeast in the starter, ensuring a vigorous fermentation.
- Bread Flour (500g): Using bread flour is key for structure and chewiness. Its higher protein content helps create that perfect, sliceable loaf.
- Fine Sea Salt (10g): A pinch of salt not only enhances flavor but also regulates fermentation. Don’t skip it!
- Unsalted Butter (15g): For an extra soft crumb, a touch of butter goes a long way. It adds richness that makes your bread irresistible.
These ingredients work together to create a loaf that’s perfect for turkey bacon or chicken ham sandwiches. Ready to get baking? Check out King Arthur Baking for tips on flour selection and starter maintenance!
Step-by-Step Preparation of Amazing 1-Day Sourdough Sandwich Bread
Making amazing 1-day sourdough sandwich bread soft is a rewarding experience, and the steps are simpler than you might think. Let’s dive into each part of the process to create a delicious loaf perfect for your everyday sandwiches.
Combine the Active Starter and Warm Water
Start by gathering your ingredients. In a large bowl, mix 100g of your active sourdough starter with 350g of warm water (around 85°F). Stir them together until well incorporated. This is where the magic begins; your starter needs to be bubbly and active for the best results. If you need tips to revive an inactive starter, check out The Perfect Loaf.
Mix in the Flour and Rest (Autolyse)
Next, add 500g of bread flour to the bowl. Use your hands to mix everything into a shaggy mass. Don’t worry about kneading it just yet! Cover it with a cloth and let it rest for 30 minutes. This autolyse phase helps develop gluten and hydration, resulting in a lighter loaf.
Incorporate the Salt Into the Dough
After your dough has rested, sprinkle 10g of fine sea salt over it. Get your fingers wet, then dimple the salt into the dough before mixing it fully. This step is crucial for flavor and structure—don’t skip it!
Perform the Stretch and Folds
Now comes the fun part: the stretch and folds! Every 30 minutes, for a total of four sets, wet your hands and stretch one side of the dough upwards, then fold it over the center. Turn the bowl and repeat this three more times. This technique helps build strength and elasticity in your dough.
Let the Dough Rise
Once your final set of folds is complete, cover the bowl and let it rest at room temperature for 2 to 4 hours. You're looking for about a 50% increase in volume and some bubbly activity. It’s like watching your dough come to life!
Shape the Dough and Proof
Now, it’s time to shape your dough into a tight log or oval. Place it seam-side down in a lightly greased 9×5 inch loaf pan. Cover it loosely and let it proof for 1 to 2 hours, or until it has risen about an inch above the rim of the pan.
Preheat the Oven
While your dough is doing its final proof, preheat your oven to 375°F (190°C), making sure to place a rack in the lower third of the oven. This will ensure a well-baked crust.
Bake the Sourdough Bread
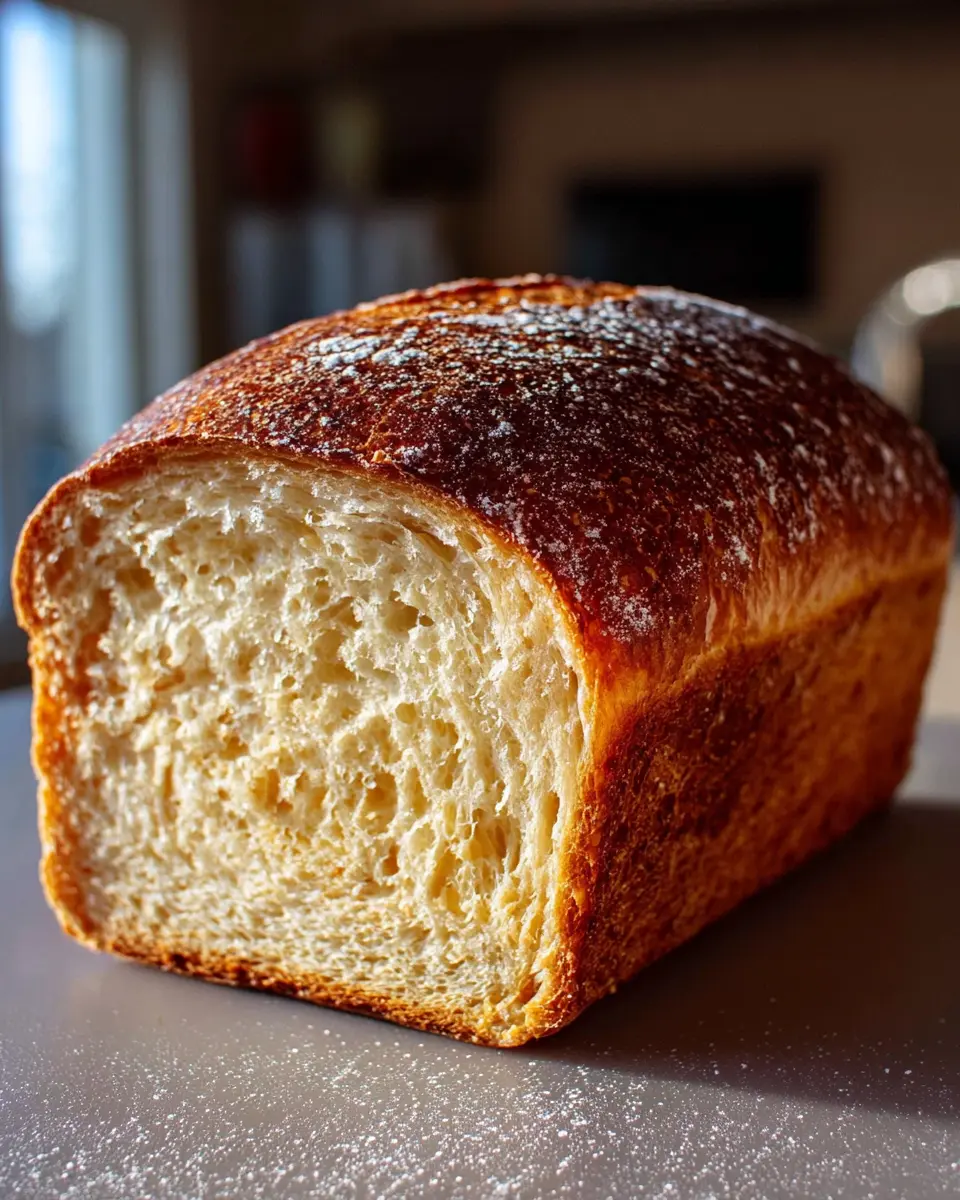
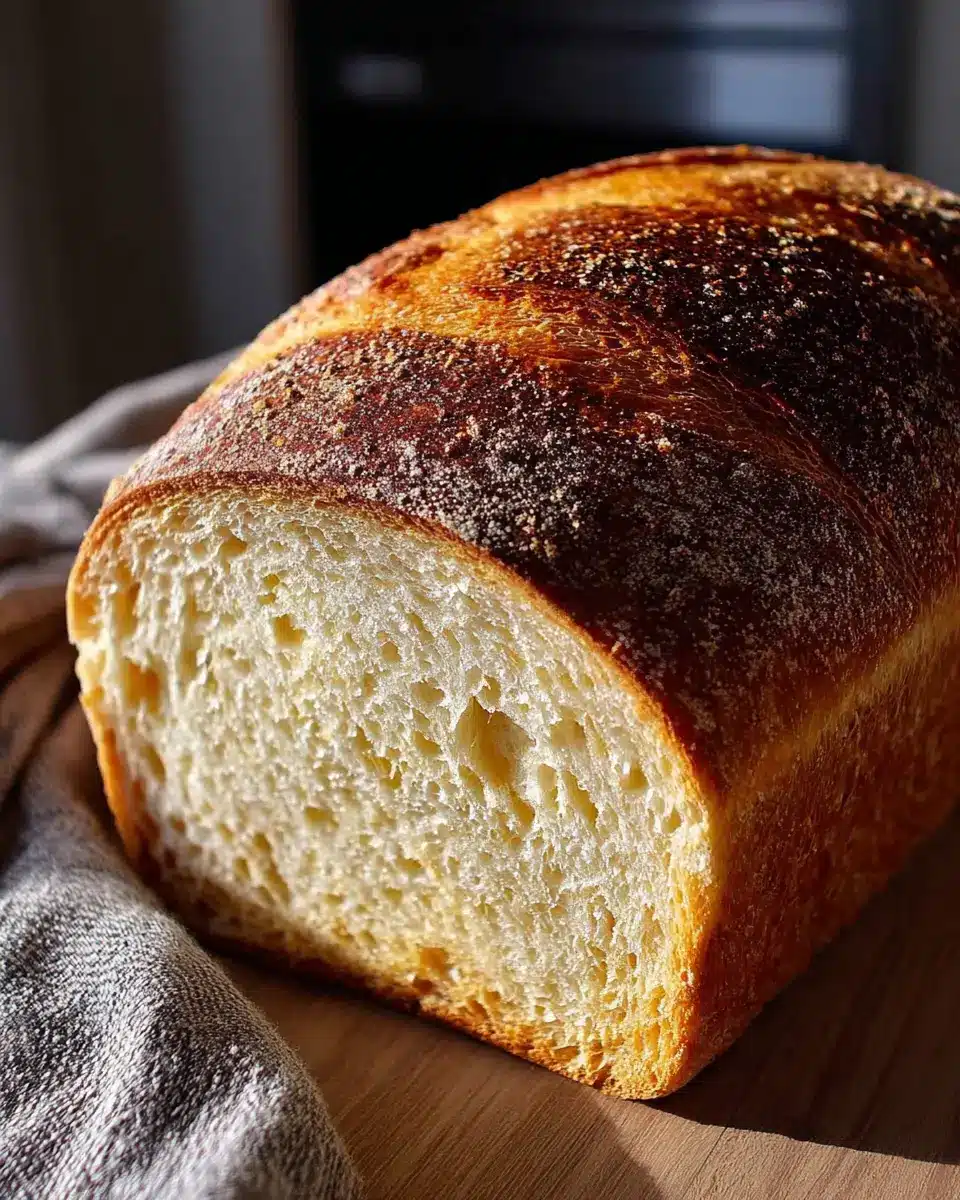
Once proofed, carefully place the loaf in the oven and bake it for 35 to 45 minutes. You’re looking for that golden brown crust and an internal temperature of 200°F (93°C) for optimal doneness.
Cool the Bread Before Slicing
When it’s done baking, remove the bread from the pan immediately. Place it on a wire rack to cool completely—resist the urge to slice it right away! Allow it to cool for about 2 hours for the best texture when slicing.
With these steps, you’ll have amazing 1-day sourdough sandwich bread soft enough to impress anyone, ready for turkey bacon, chicken ham, or even a simple spread of butter. Happy baking!
Variations of Amazing 1-Day Sourdough Sandwich Bread
Adding herbs and seeds for extra flavor
The beauty of amazing 1-day sourdough sandwich bread soft lies in its versatility. Infusing the dough with your favorite herbs like rosemary, thyme, or even garlic powder can elevate your bread to new heights. Consider adding seeds such as sunflower or sesame for texture and flavor. Simply mix in about 2-3 tablespoons during the initial mixing stage for an aromatic loaf that pairs perfectly with any sandwich.
Making whole grain sourdough bread
Want to add a bit of whole grain goodness? You can substitute a portion of the bread flour with whole wheat flour or spelt flour. Start with a 20% substitution and see how you like the flavor and texture. Whole grains will not only enrich the bread but offer added fiber and nutrients. Don’t forget to adjust the hydration slightly, as whole grain flours absorb more moisture than white flour. Give it a try and enjoy a nutritious twist on your next sourdough creation!
Cooking Tips and Notes for Amazing 1-Day Sourdough Sandwich Bread
Tips for Ensuring a Soft and Fluffy Texture
To achieve amazing 1-day sourdough sandwich bread soft, focus on using quality ingredients. Always opt for bread flour, as its higher protein content promotes a better structure and chew. For an extra soft crumb, don’t forget to brush the loaf with melted butter right out of the oven. This not only adds flavor but also helps keep the crust soft.
Tricks for Successful Proofing in Different Environments
Proofing can be tricky, especially in varying temperatures. If your kitchen is chilly, consider creating a warm environment by placing the dough in a turned-off oven with the light on. This will help speed up the fermentation process, allowing your bread to rise properly. Always keep an eye on the dough; remember, it should increase in volume by about 50% before baking for that perfect texture!
Serving Suggestions for Amazing 1-Day Sourdough Sandwich Bread
Perfect pairings for your sandwiches
This amazing 1-day sourdough sandwich bread soft serves as the perfect canvas for a variety of delicious fillings. Try these mouthwatering combinations:
- Turkey Bacon and Avocado: Layer crispy turkey bacon with ripe avocado slices, a sprinkle of salt, and a dash of lemon juice for a fresh twist.
- Chicken Ham and Cheese: For a classic taste, stack smoked chicken ham with your favorite cheese like Swiss or cheddar. Add some lettuce for crunch.
- Vegetable Medley: Go meatless with roasted veggies like bell peppers, zucchini, and a spread of hummus for a satisfying bite.
Creative uses for leftover bread
No one likes wasting food, right? If you find yourself with extra slices, consider these fun options:
- Bread Pudding: Transform stale slices into a sweet, comforting bread pudding—just add eggs, milk, sugar, and cinnamon.
- Croutons: Cube your leftover bread, toss with olive oil and seasoning, then bake until crispy for homemade croutons perfect for salads.
- French Toast: Revive your leftover bread by making delicious French toast for brunch—just dip in a mixture of eggs and milk!
For more inspiration, check out Food Network’s Creative Bread Uses. Enjoy your baking adventure!
Time Breakdown for Amazing 1-Day Sourdough Sandwich Bread
Preparation Time
The initial mixing and autolyse take about 30 minutes, laying a solid foundation for your dough.
Rising Time
You’ll spend approximately 2 to 4 hours letting the dough rise at room temperature, allowing it to develop flavor and texture. For an amazing 1-day sourdough sandwich bread soft, keep an eye on those bubbles!
Baking Time
Baking the bread will take about 35 to 45 minutes. The golden crust transforms your loaf into a tantalizing centerpiece.
Total Time
In just 4 hours and 45 minutes, you can enjoy this delightful homemade bread, perfect for sandwiches, toast, or simply on its own!
Ready to get baking? Check out more about sourdough techniques at The Perfect Loaf.
Nutritional Facts for Amazing 1-Day Sourdough Sandwich Bread
When you're diving into the world of amazing 1-day sourdough sandwich bread soft, understanding its nutrition can help you make informed choices for your meals.
Calories per slice
Each slice of this delectable sourdough bread contains approximately 250 calories. Whether you’re enjoying it as a base for delicious sandwiches or a comforting toast, it fits into a balanced diet.
Protein content
With 9 grams of protein per slice, this bread provides a decent boost to your daily intake, making it a great option to fuel your busy lifestyle. Pair it with turkey bacon or chicken ham for an extra protein kick!
Key nutritional elements
This bread isn’t just tasty; it packs in essential nutrients:
- Carbohydrates: 50g, providing energy for your day.
- Fiber: 2g, promoting a healthy digestive system.
- Fat: 3g, with heart-healthy unsaturated fats contributing to overall wellness.
With these nutritional benefits, enjoying amazing 1-day sourdough sandwich bread soft can be both indulgent and nourishing. For more insights on healthy eating, consider exploring resources like the USDA Nutrition Database or Nutrition.gov.
FAQs about Amazing 1-Day Sourdough Sandwich Bread
How can I tell if my sourdough is properly risen?
The key to achieving amazing 1-day sourdough sandwich bread soft lies in knowing when your dough is ready. Look for a 50% increase in volume and a bubbly surface. A simple "poke test" can help: gently poke the dough with a finger. If the indentation springs back slowly, you’re good to go!
Can I make this bread without a sourdough starter?
Unfortunately, you can't achieve that signature tangy flavor and texture without a sourdough starter. However, you can create your own starter with just flour and water, which is both fun and rewarding! For detailed guidance on making a starter, check out resources from King Arthur Baking.
What should I do if my bread is too dense?
If your bread turns out dense, it could be due to insufficient rising time or not enough hydration in your dough. Ensure you’re measuring ingredients accurately and giving ample time for each rise. A lighter loaf often comes from a well-hydrated dough and proper proofing, so don't rush the process!
Conclusion on Amazing 1-Day Sourdough Sandwich Bread
Creating amazing 1-day sourdough sandwich bread soft at home is not only fulfilling but also a fun culinary adventure. This straightforward recipe yields a deliciously soft loaf that you can enjoy for sandwiches and toast alike. Enjoy the satisfaction of baking your bread, and share it with family and friends!

Amazing 1-Day Sourdough Sandwich Bread Soft
Equipment
- large bowl
- Loaf pan
- oven
- wire rack
Ingredients
- 100 g active sourdough starter 100% hydration
- 350 g warm water around 85F
- 500 g bread flour
- 10 g fine sea salt
- 15 g unsalted butter softened
Instructions
- Mix the active starter and warm water in a large bowl until combined.
- Add the flour and mix by hand until just combined into a shaggy mass. Let this rest, covered, for 30 minutes (autolyse).
- Sprinkle the salt over the dough. Dimple it in with wet fingers, then mix until the salt is incorporated.
- Perform four sets of stretch and folds, spaced 30 minutes apart. For each set, wet your hands, grab one side of the dough, stretch it up, and fold it over the center. Rotate the bowl and repeat three more times.
- After the final set of folds, let the dough rest, covered, at room temperature (around 72F) for 2 to 4 hours, or until it has increased in volume by about 50% and shows some bubbles.
- Gently shape the dough into a tight log or oval and place it seam-side down into a lightly greased 9×5 inch loaf pan.
- Cover the pan loosely and let it proof at room temperature for 1 to 2 hours, or until the dough has risen about 1 inch above the rim of the pan.
- Preheat your oven to 375F (190C) with a rack in the lower third position.
- Bake for 35 to 45 minutes, or until the crust is golden brown and the internal temperature reaches 200F (93C).
- Remove the bread from the pan immediately and let it cool completely on a wire rack before slicing, about 2 hours.


Leave a Reply