
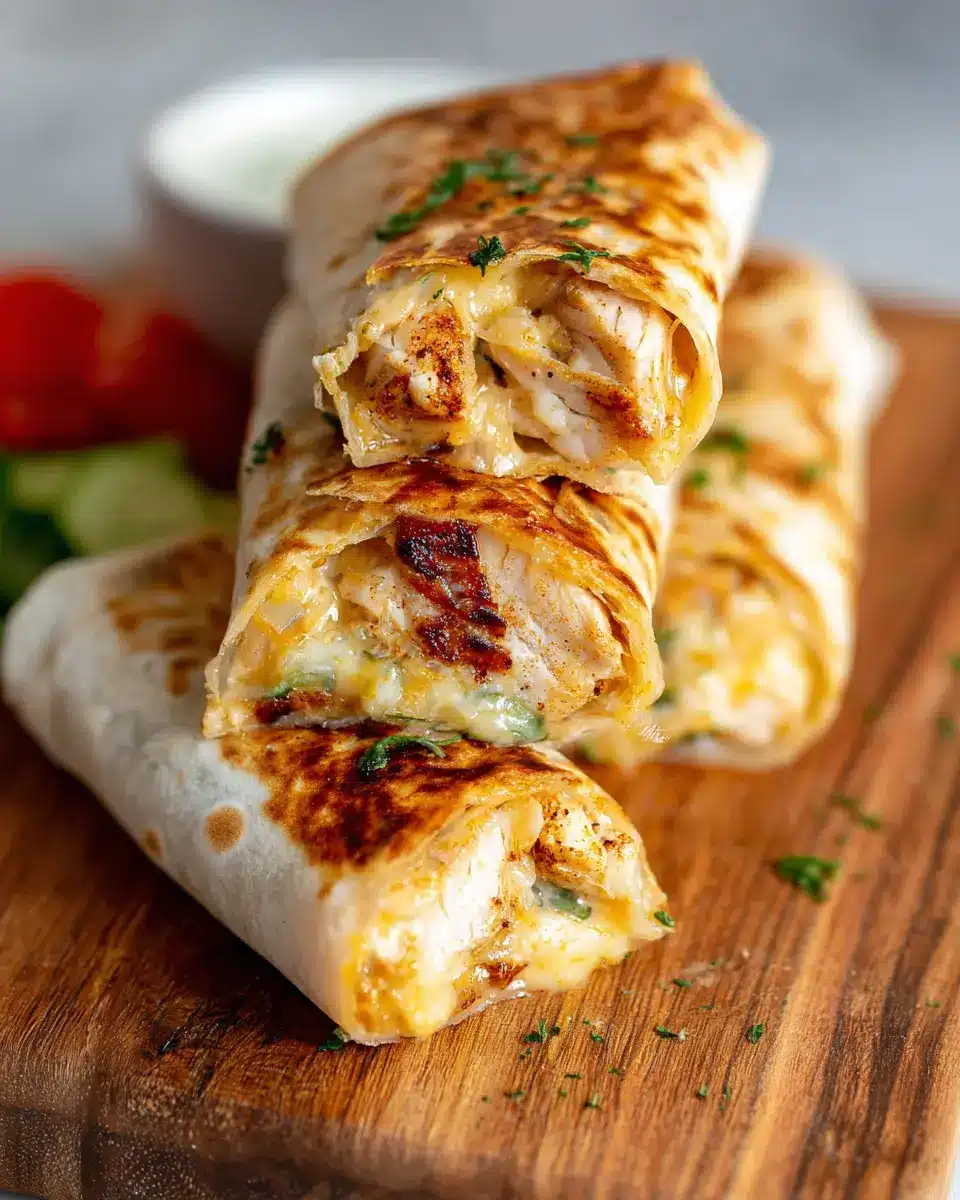
Introduction to Cheesy Garlic Chicken Wraps
When you're juggling work deadlines, social commitments, and maybe even a workout regimen, finding time to prepare a delicious meal can feel impossible. That’s where cheesy garlic chicken wraps come to the rescue! These tasty wraps are not only quick to make—taking just 22 minutes from start to finish—but they also pack a protein punch with tender chicken and ooey-gooey cheese.
Why Cheesy Garlic Chicken Wraps Are the Perfect Meal for Busy Professionals
This wrap is ideal for busy professionals like you who need something satisfying yet easy to whip up. Here’s why they shine:
- Speed: With just 15 minutes of prep and 7 minutes of cooking, you can enjoy a homecooked meal in less time than it takes to order takeout.
- Customizable: Whether you prefer spicy, creamy, or extra cheesy, you can easily tweak the ingredients to match your taste.
- Portable: Need a meal on the go? Wrap it up, and you’ve got a delicious, handheld meal perfect for lunch at your desk or a quick dinner after a long day.
So, the next time you're short on time but craving something hearty, turn to these cheesy garlic chicken wraps; they just might become your new go-to in the kitchen! Feel free to visit Eat Right for more nutritious meal ideas that fit your lifestyle.

Ingredients for Cheesy Garlic Chicken Wraps
Essential ingredients for a delicious wrap
To create your perfect cheesy garlic chicken wraps, you'll need a handful of key ingredients that combine to deliver a satisfying, flavorful experience. Here’s what you'll want:
- Large tortillas: Choose regular or low-carb/high-protein varieties for a flexible base.
- Cooked chicken: About 7 oz (200 grams) of chopped rotisserie chicken works wonders – it's so convenient!
- Garlic: Two cloves, minced or grated, infuse your wrap with rich flavor. Adjust based on your garlic love!
- Light mayonnaise and Greek yogurt: These add creaminess while keeping things light—just two tablespoons of mayo and one tablespoon of yogurt.
- Hot sauce: A tablespoon of your favorite brand, like Frank's, adds a zesty kick!
- Grated cheese: Three ounces (90 grams) of a cheddar blend is key for that gooey goodness.
Optional ingredients for added flavor
Feel free to customize your wraps with these optional ingredients for an extra layer of deliciousness:
- Green onions: A sprinkle of chopped green onions brightens up the flavor profile.
- Seasoned salts or spices: Consider adding a touch of smoked paprika or black pepper for additional depth.
- Extra toppings: Avocado or fresh herbs can bring freshness and a slight twist to your wraps.
For more ingredient inspiration and cooking tips, check out resources like The Kitchn for creative twists and variations! Happy cooking!
Preparing Cheesy Garlic Chicken Wraps
Making cheesy garlic chicken wraps at home is not only simple but also incredibly satisfying. You’ll love how quickly you can whip up these flavorful wraps, perfect for lunch or a light dinner. Let’s walk through the steps together!
Gather Your Ingredients
Before diving into the cooking, make sure you have all the ingredients handy. Here’s what you’ll need:
- 2 large tortillas (regular or low-carb/high-protein for a healthier option)
- 7 oz cooked chicken (about 200 grams, chopped; rotisserie chicken works great for ease!)
- 2 garlic cloves (minced or grated, adjust according to your love for garlic)
- 2 tablespoons light mayonnaise
- 1 tablespoon light Greek yogurt (or plain yogurt)
- 2 teaspoons hot sauce (like Frank’s, for a little kick)
- ¼ teaspoon salt
- 3 oz grated cheese (around 90 grams; a cheddar blend adds a lovely flavor)
- 1 green onion (chopped for garnish)
- Olive oil spray (for that golden finish)
Having everything prepped makes cooking smoother and more enjoyable. Now, let’s mix things up!
Mix the Chicken Filling
In a large bowl, combine the chopped chicken, minced garlic, mayonnaise, yogurt, hot sauce, and salt. Mix well! The combination of ingredients creates a creamy, zesty filling that’s downright irresistible. If you’re interested in more chicken dish ideas, check out this chicken recipes guide.
Assemble the Wraps
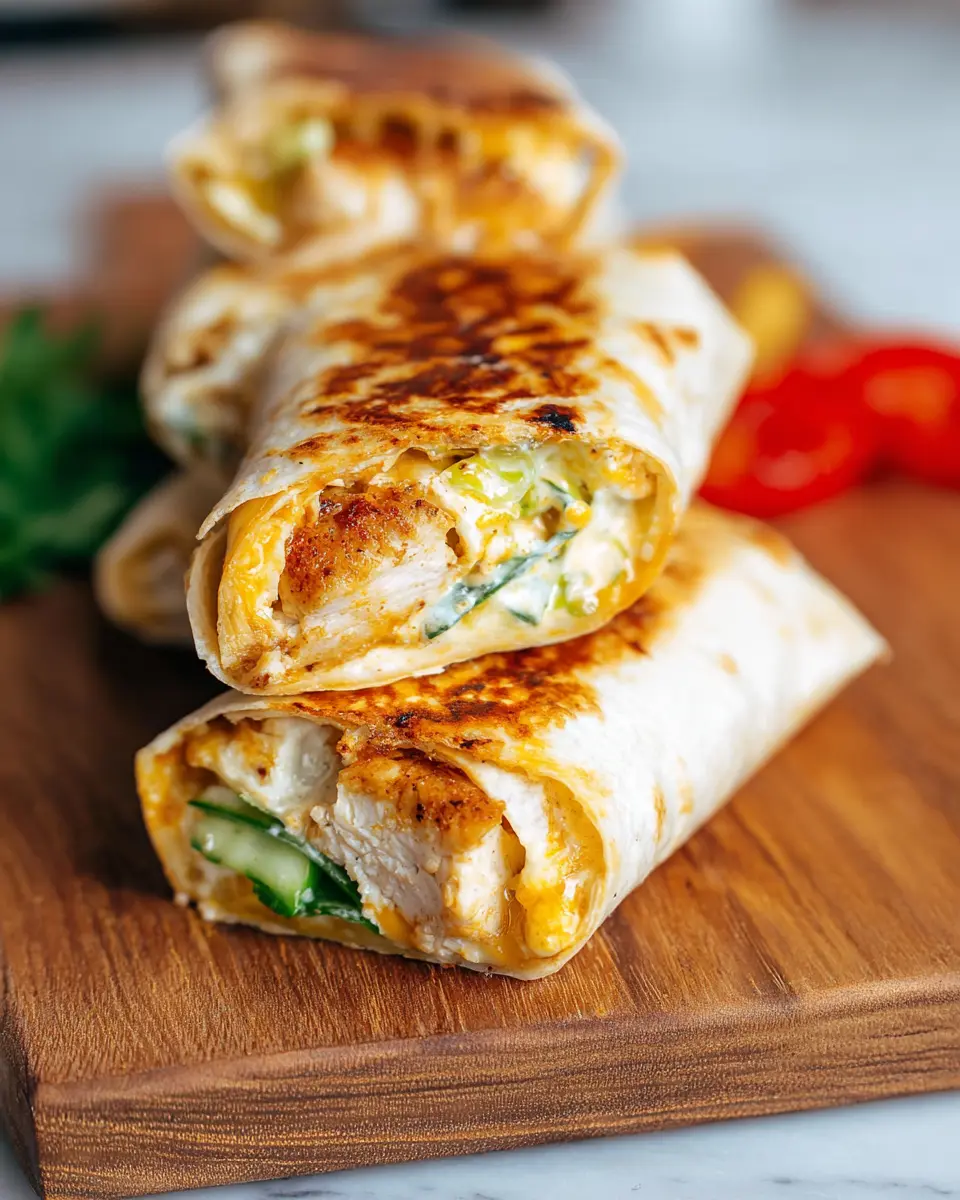
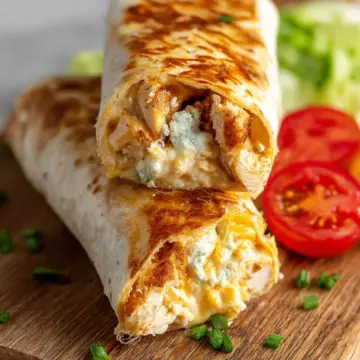
Next, lay out your tortillas. On the lower third of each tortilla, sprinkle about 2 tablespoons of cheese. Then, add approximately ⅔ cup of the chicken mixture, followed by another tablespoon of cheese and a sprinkle of chopped green onion.
To fold, tuck in the sides of the tortilla and roll it tightly from the bottom. This keeps all that yummy filling secure for the next step.
Cook the Wraps
Heat a non-stick pan over medium-high heat and spray it lightly with olive oil. Place the wraps seam-side down in the pan. Cook for about 3–4 minutes on each side until they're crispy and golden brown. For optimal melting, covering with a lid helps heat the insides quickly.
Slice and Serve Your Cheesy Garlic Chicken Wraps
Once your wraps are beautifully browned, remove them from the heat and slice them in half. Serve these delightful cheesy garlic chicken wraps warm, perhaps with a side of salsa or crunchy salad. If you’re feeling adventurous, feel free to add your favorite dips or even some crunchy chips!
In just a few simple steps, you’ve prepared a delicious meal that’s packed with flavor and protein. Enjoy!
Variations on Cheesy Garlic Chicken Wraps
Spicy Cheesy Garlic Chicken Wraps
If you're a fan of a little heat, try adding some jalapeños or a spicy cheese to your cheesy garlic chicken wraps. Just mix in finely chopped pickled jalapeños with the chicken filling or swap in pepper jack cheese for that extra kick. You can also experiment with different hot sauces—there are so many flavors out there that can elevate your meal into something downright addictive!
Vegetarian Cheesy Garlic Wraps
Craving something lighter or meat-free? No problem! Substitute the chicken with a hearty mix of grilled vegetables like zucchini, bell peppers, and mushrooms. Sprinkle in some extra garlic and replace cheese with a plant-based option, or simply go for your favorite gooey mozzarella. These vegetarian cheesy garlic wraps are not only delicious but also create a satisfying alternative that everyone will love. Check out this guide on cooking veggies for even more ideas!
Cooking tips and notes for Cheesy Garlic Chicken Wraps
Best practices for cooking
To achieve the crispy perfection of your cheesy garlic chicken wraps, ensure your pan is adequately preheated before adding the wraps. This helps lock in that delightful crunch. Remember to cover the pan as they cook to evenly melt the cheese and warm the filling.
Make-ahead and storage tips
Planning ahead? You can prepare the chicken filling two to three days in advance and store it in the fridge. Just roll up the wraps when you’re ready to enjoy! If you have leftovers, store them in the fridge for up to two days. Reheat in a skillet or air fryer for that fresh-out-of-the-pan taste. For long-term storage, freeze the filling for up to a month instead of the wraps to maintain texture.
For more handy storage tips, check out the USDA’s food storage guidelines.
Serving suggestions for Cheesy Garlic Chicken Wraps
Accompaniments that complement the wraps
While your cheesy garlic chicken wraps are delightful on their own, pairing them with a fresh, crunchy salad brings a refreshing balance to the meal. Consider a simple side of mixed greens tossed with cherry tomatoes, cucumbers, and a light vinaigrette. Roasted vegetables, such as zucchini and bell peppers, also make for a wonderful and colorful accompaniment.
Creative dipping sauces
To enhance the flavor experience, try serving these wraps with creative dipping sauces. A zesty salsa or avocado crema adds a creamy touch, while a tangy yogurt sauce mixed with herbs brings in a refreshing bite. If you prefer a kick, whip up a spicy sriracha mayo—it perfectly complements the cheesy goodness of your wraps. Explore more sauce ideas on Serious Eats or The Kitchn for some inspiration!
Time breakdown for Cheesy Garlic Chicken Wraps
Preparation time
Getting ready to dive into the deliciousness of these cheesy garlic chicken wraps takes just 15 minutes. This includes gathering your ingredients and prepping the filling. It’s a quick assembly that makes cooking fun!
Cooking time
Once your wraps are ready to go, the cooking time is just 7 minutes. You’ll be flipping them in a hot pan, letting that cheese melt to gooey perfection while achieving a crispy exterior. It’s a speedy process, perfect for busy weekdays!
Total time
In just 22 minutes, you can enjoy a satisfying meal that’s both indulgent and wholesome. This total time allows for an easy, stress-free cooking experience, leaving plenty of time to savor every cheesy bite. Perfect for a hearty lunch or a quick dinner after a long day.
For more tips on preparing and cooking these cheesy garlic chicken wraps, check out important kitchen skills here or learn about the benefits of meal prepping here. These resources can enhance your cooking experience and help you whip up delicious meals in no time!
Nutritional Facts for Cheesy Garlic Chicken Wraps
Calories per Serving
Each serving of these cheesy garlic chicken wraps contains approximately 476 calories. This makes it a satisfying option for lunch or dinner, providing enough energy without being overly indulgent.
Protein Content
If you're looking to up your protein intake, these wraps are a great choice! With about 38 grams of protein per serving, they help in muscle recovery and keep you feeling full longer.
Sodium Levels
Be mindful of sodium while enjoying your wraps, as they contain around 1,090 mg of sodium per serving. If you’re watching your salt intake, consider adjusting the amount of added salt or using low-sodium ingredients.
For more information on balanced eating, check out resources at ChooseMyPlate.gov. Enjoy your wraps, and remember to pair them with fresh veggies for an even healthier meal!
FAQs about Cheesy Garlic Chicken Wraps
How can I make the wraps healthier?
To give your cheesy garlic chicken wraps a healthier twist, consider these options:
- Swap the tortillas: Use whole grain or low-carb tortillas to boost fiber.
- Reduce cheese: You can cut back on cheese without sacrificing too much flavor. Try using a strong-flavored cheese so you can use less.
- Add more veggies: Incorporate spinach, bell peppers, or shredded carrots for added nutrients and volume.
Can I freeze the wraps for later?
While it's best not to freeze cheesy garlic chicken wraps already assembled, the filling can be frozen for up to a month. Just portion it out, then thaw and wrap when you’re ready to enjoy. This way, you can have a quick meal ready to go anytime!
What can I substitute for the cheese?
If you're looking to skip cheese or switch things up, consider:
- Nutritional yeast: It adds a cheesy flavor without the dairy and is packed with B vitamins.
- Vegan cheese options: There are many tasty plant-based cheeses that melt well for a creamy filling.
- Creamy avocado: For a rich texture, mashed avocado can be an excellent substitute in your wraps.
Feel free to experiment and find what suits your palate best!
Conclusion on Cheesy Garlic Chicken Wraps
A final note on why you should try making these wraps at home
If you’re looking for a quick, nutritious meal, cheesy garlic chicken wraps are your answer. They are easy to make, packed with flavor, and perfect for lunch or dinner. Plus, customizing them is a breeze. Who can resist that gooey, cheesy goodness? Dive into this delightful dish today!
Cheesy Garlic Chicken Wraps
Equipment
- Non-stick pan
Ingredients
- 2 large tortillas regular or low-carb/high-protein
- 7 oz cooked chicken about 200 grams, chopped (rotisserie is great)
- 2 cloves garlic minced or grated (adjust to taste)
- 2 tablespoons light mayonnaise
- 1 tablespoon light Greek yogurt or plain yogurt
- 2 teaspoons hot sauce like Frank’s
- ¼ teaspoon salt
- 3 oz grated cheese about 90 grams (I used a cheddar blend)
- 1 green onion chopped
- Olive oil spray
Instructions
- In a bowl, mix chopped chicken, garlic, mayonnaise, yogurt, hot sauce, and salt.
- Lay out your wrap. On the lower third of the tortilla, sprinkle about 2 tablespoons of cheese, then top with about ⅔ cup of the chicken mixture. Add another tablespoon of cheese and a sprinkle of green onion.
- Fold in the sides of the tortilla, then roll it up tightly from the bottom.
- Heat a non-stick pan over medium-high. Spray with olive oil.
- Place wraps seam-side down. Cook for 3–4 minutes per side until crispy and golden. Cover with a lid to help heat the inside.
- Slice in half and serve!
Leave a Reply