
Introduction to Butterfinger Balls
A Sweet Treat for Every Occasion
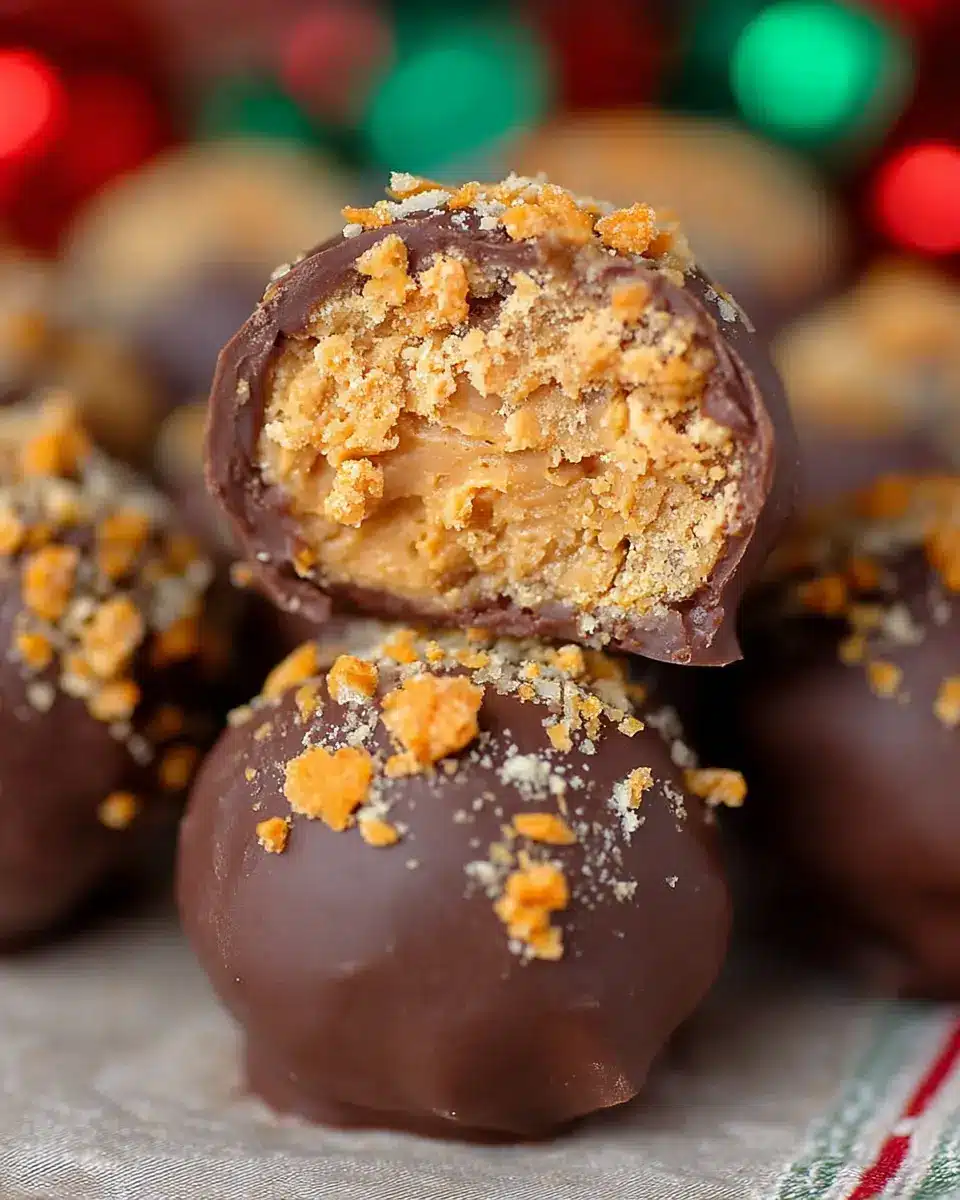
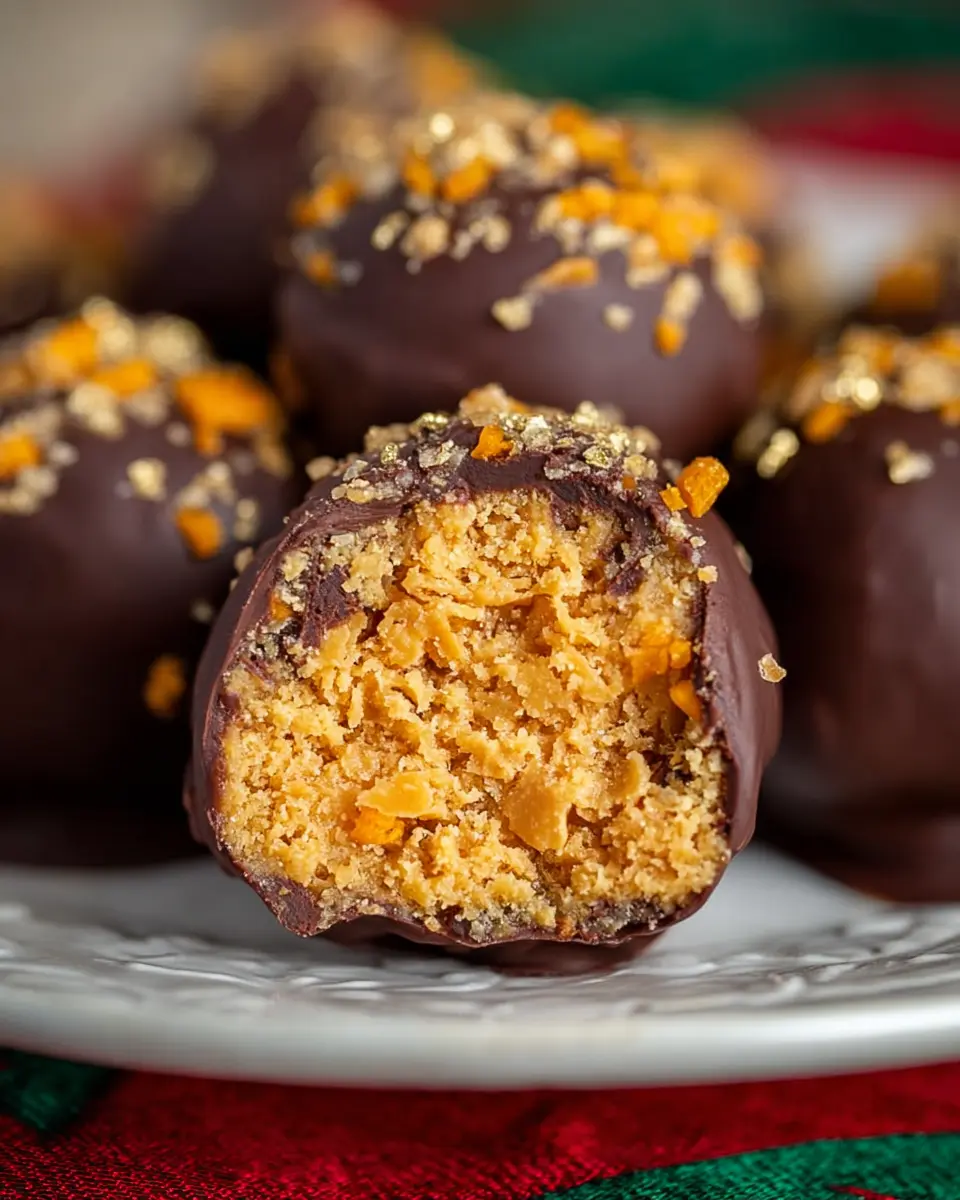
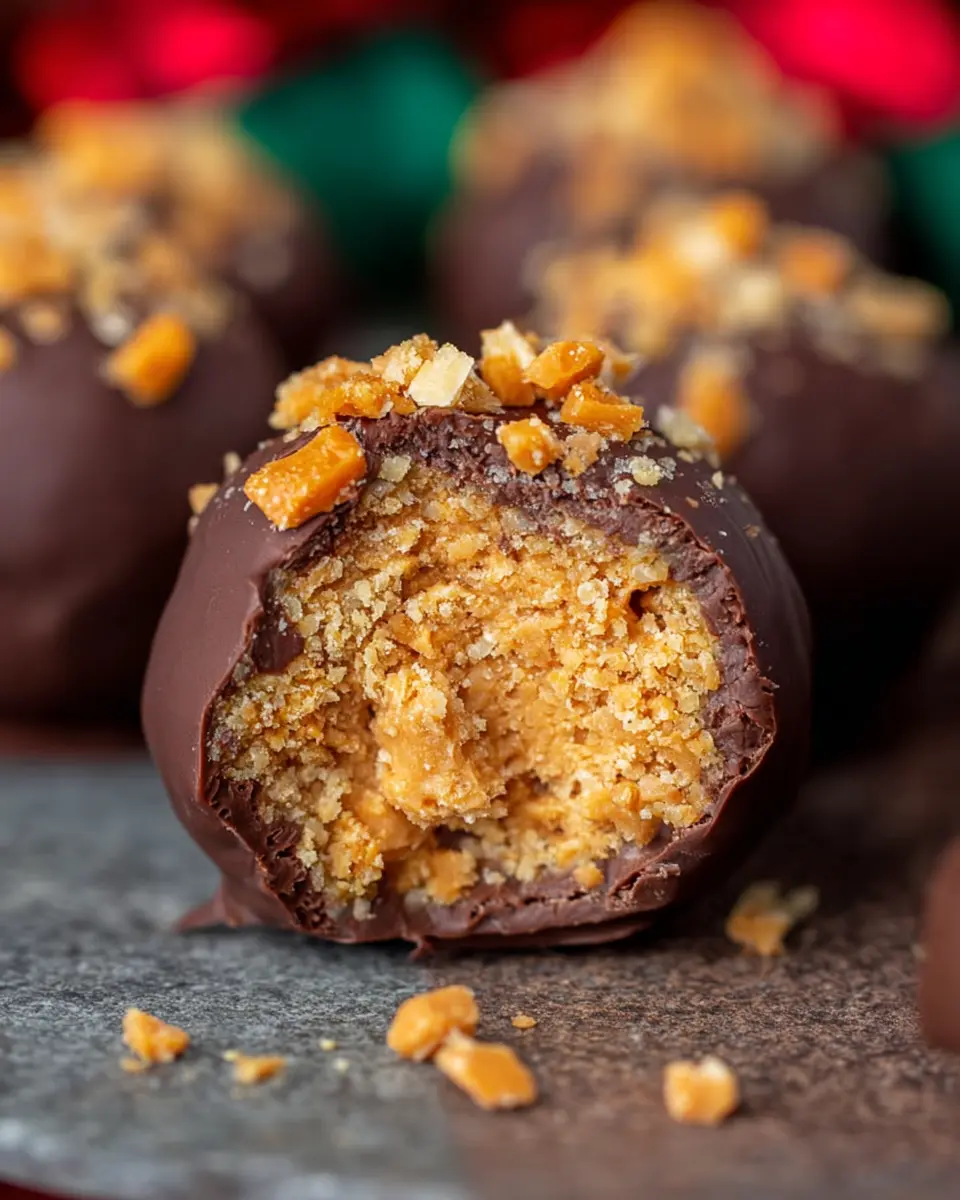
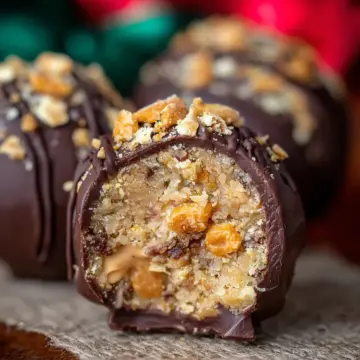
If you’re looking for a deliciously sweet treat that’s sure to impress, Butterfinger Balls might just be your new go-to recipe! These little morsels combine the beloved flavors of crunchy peanut butter, graham crackers, and the signature butterscotch taste of Butterfinger bars, all enveloped in a rich chocolate coating. With such a delightful combination, it’s no wonder these treats become an instant favorite at parties, game days, and family gatherings.
Making Butterfinger Balls is not only simple but also fun! You can easily whip up a batch in just 15 minutes, and the best part is—they can be made ahead of time and stored until you’re ready to enjoy them. Whether you're treating yourself or crafting a homemade gift for a friend, these bites of bliss will surely bring a smile to anyone’s face.
Plus, don't hesitate to get creative! You can decorate these enticing balls with colorful sprinkles or drizzle on extra chocolate for a personal touch. So gather your ingredients, roll up your sleeves, and get ready to indulge in this irresistibly sweet adventure. For more irresistible dessert ideas, check out Taste of Home or Food Network.
Ingredients for Butterfinger Balls
Essential Ingredients for Delicious Butterfinger Balls
Creating Butterfinger Balls is incredibly easy when you have the right ingredients on hand. Here’s a breakdown of what you’ll need to whip up this tasty treat:
- Powdered Sugar: 1 (16-oz) box for sweetness and texture.
- Graham Cracker Crumbs: 2½ cups to add a delightful crunch and flavor.
- Butterfinger Bars: 5 (1.9-oz) bars, crushed into bits, for that iconic Butterfinger taste.
- Butter: 1¼ cup, melted, to bind it all together.
- Crunchy Peanut Butter: 1½ cups to give it a rich, nutty flavor (feel free to swap for creamy if you prefer).
- Chocolate Candy Coating: 1 (24-oz) package of chocolate almond bark or similar for that luscious outer layer.
These ingredients blend together to create a divine treat that's perfect for parties and gatherings! Consider checking out the benefits of using natural peanut butter in your recipes on Healthline for added health insights!
Do you already have some of these ingredients in your pantry?
Preparing Butterfinger Balls
Gather Your Ingredients
To whip up a batch of delectable Butterfinger Balls, you’ll need the following ingredients:
- 1 (16-oz) box powdered sugar
- 2½ cups graham cracker crumbs
- 5 (1.9-oz) Butterfinger bars, crushed
- 1¼ cup melted butter
- 1½ cups crunchy peanut butter
- 1 (24-oz) package chocolate almond bark or chocolate candy coating
Gather all these goodies first, so you're ready to enjoy the cooking process! Trust me, there’s nothing worse than realizing halfway through that you’re missing a key ingredient.
Mix the Base Ingredients
In a large bowl, combine the powdered sugar, graham cracker crumbs, crushed Butterfinger bars, melted butter, and crunchy peanut butter. Mix until everything is well-integrated. At this point, you may want to use your hands for a quick and fun mix, but make sure to wash them first! This easy step sets the base for a deliciously sweet treat that’s sure to become a favorite.
Shape the Balls
Now the fun part—shaping your mixture into balls! Using a cookie scoop, take portions of your mixture and roll them into 1-inch thick balls. Place them on a lined baking sheet. Pro tip: If the dough is too sticky, you might want to chill it slightly beforehand. Doing so makes it easier to handle and ensures your Butterfinger Balls are perfectly round!
Chill the Mixture
Once you’ve shaped your balls, it's time for a little downtime—refrigerate them for about 30 minutes. Chilling helps the balls firm up, so they hold their shape during the next delicious step. Besides, isn’t it nice to take a pause, grab a cup of coffee or tea, and reflect on your outstanding culinary skills so far?
Dip in Chocolate Coating
While your Butterfinger Balls are chilling, you can start preparing your chocolate coating. Melt your chocolate almond bark according to the package instructions, ensuring it’s smooth and glossy.
Once your balls are chilled, dip each one into the melted chocolate, ensuring they’re generously coated. Use a fork to lift them out, letting the excess chocolate drip off. Place the dipped balls onto parchment or wax paper, and let them sit until the chocolate has fully set. This might be the hardest part—waiting for those sugary bites to become perfectly chocolate-coated!
And voilà! You’ve just made your very own Butterfinger Balls! Feel free to get creative with decorations or enjoy them as-is. Perfect for parties, gifts, or a personal treat, these little bites of joy will surely impress!
With each step lovingly detailed, you're ready to treat yourself and your friends to an irresistible snack. If you're daring to experiment with flavors and decorations, feel free to visit Butterfinger's official site for inspiration!
Variations on Butterfinger Balls
White Chocolate Butterfinger Balls
If you're a fan of the traditional chocolate coating but crave something a bit sweeter, try making White Chocolate Butterfinger Balls. Simply melt white chocolate instead of the classic chocolate almond bark. The rich, creamy flavor perfectly complements the peanut butter and Butterfinger bits, creating a delightful contrast. To add a bit of flair, consider drizzling some melted milk or dark chocolate on top for a decorative touch.
Peanut Butter Cup Variation
For the ultimate treat, transform your Butterfinger Balls into a Peanut Butter Cup Variation. Start by mixing in mini peanut butter cup pieces into your dough, adding a delightful surprise inside each ball. Once dipped, you can roll them in crushed peanuts or even sprinkle a hint of sea salt for that sweet-and-salty balance. This variation will surely impress your friends at gatherings, making them the star of the snack table!
Discover more twists on classic recipes to keep things fresh and exciting.
Cooking Tips and Notes for Butterfinger Balls
Make Ahead and Storage Tips
If you're planning a gathering, Butterfinger Balls can be made several days in advance! Just store them in an airtight container to keep them fresh. They’re perfect for parties or as homemade gifts, and they'll save you time on the day of your event. Just remember to let them sit at room temperature for a few minutes before serving; that way, they’ll be extra tasty!
Customizing with Toppings
Add a fun twist to your Butterfinger Balls by customizing them with assorted toppings. Consider rolling them in crushed nuts, sprinkles, or even a drizzle of caramel for an extra layer of sweetness. If you’re feeling festive, color-coordinated sprinkles can suit any occasion!
For more creative ideas, check out this great resource on decorating truffles that could inspire your presentation!
Serving Suggestions for Butterfinger Balls
Party Platter Ideas
When it comes to serving Butterfinger Balls, think variety and presentation! Arrange these delightful treats on a colorful platter surrounded by some crunchy snacks like pretzels or popcorn. Consider using decorative cupcake liners to elevate the look. Mixing in small bowls of caramel sauce or chocolate drizzle for dipping can take your platter to the next level. Need some inspiration? Check out this party ideas list for creative ways to spruce up your dessert table.
Gift Ideas for Friends and Family
Butterfinger Balls make fantastic homemade gifts! Package them in cute jars or decorative boxes tied with a festive ribbon. They’re a sweet surprise for birthdays, holidays, or just because. Consider including a personalized note with the recipe to share the joy of creating these treats. If you're looking for eco-friendly packaging options, this guide on sustainable gifting can help you find the perfect ideas to make your gifts stand out.
Time Breakdown for Butterfinger Balls
Preparation Time
Start your delightful journey to making Butterfinger Balls with just 15 minutes of preparation. This includes mixing all those delectable ingredients together, so you can dive straight into the fun part—shaping those sweet morsels.
Chilling Time
After you’ve rolled your balls, they’ll need about 30 minutes in the refrigerator. This chilling time not only helps them firm up but also enhances the flavors, making each bite even more irresistible.
Total Time
In less than an hour (45 minutes total), you’ll create these delicious treats that are perfect for sharing at parties or enjoying during a cozy night in. It's a quick and satisfying endeavor that yields about three dozen Butterfinger Balls!
If you're looking for more delicious and easy recipes, check out other quick desserts like No-Bake Cheesecake Bites or Chocolate Dipped Pretzels.
Nutritional Facts for Butterfinger Balls
Calories per Serving
Each Butterfinger Ball contains approximately 120 calories. This makes them a rich yet delightful treat that you can enjoy without having to worry too much about your calorie count—everything in moderation, right?
Breakdown of Macros
When you enjoy a Butterfinger Ball, you’re indulging in a delightful mix of macros:
- Fat: 7g
- Carbohydrates: 15g
- Protein: 1g
These tasty bites are perfect for satisfying your sweet tooth while giving you a quick burst of energy, thanks to the carbohydrates and fats. For more detailed nutritional insights, check out reputable sources like Nutrition Data and MyFitnessPal.
Now you can whip up these delicious Butterfinger Balls with a better understanding of their nutritional profile, so you can feel good about treating yourself or sharing with friends!
FAQs about Butterfinger Balls
Can I use other types of chocolate?
Absolutely! While the classic recipe calls for chocolate almond bark, you can experiment with various types of chocolate. Milk chocolate adds sweetness, while dark chocolate provides a richer flavor. White chocolate is another delightful option that pairs well with the peanut butter filling. Just remember to adjust the melting methods as needed, as different chocolates may have unique melting points.
How long do Butterfinger Balls last?
If stored properly, your Butterfinger Balls can last up to two weeks in an airtight container at room temperature. For longer freshness, consider refrigerating them, which can extend their shelf life to about a month. Just be sure to let them reach room temperature before serving for the best taste and texture.
What if I don't have graham crackers?
No graham crackers? No problem! You can substitute with similar ingredients like crushed vanilla wafers or digestive biscuits. Some even use oats for a healthier twist. Just be sure the consistency allows for easy rolling into balls, maintaining that delicious Butterfinger flavor in every bite.
Conclusion on Butterfinger Balls
A Must-Try Recipe for Candy Lovers
If you’re searching for a delicious treat that’s easy to whip up, look no further than Butterfinger Balls! This recipe combines the irresistible flavors of peanut butter and chocolate, creating a dessert that's sure to impress. Perfect for parties or as a thoughtful gift, make these sweet delights for your next gathering!
Butterfinger Balls (Butterfinger Buckeye Balls)
Equipment
- cookie scoop
Ingredients
- 1 box powdered sugar 16-oz
- 2.5 cups graham cracker crumbs
- 5 bars Butterfinger bars 1.9-oz each, crushed
- 1.25 cups butter melted
- 1.5 cups crunchy peanut butter
- 1 package chocolate almond bark 24-oz or chocolate candy coating
Instructions
- In a large bowl, combine powdered sugar, graham cracker crumbs, Butterfinger bits, melted butter, and peanut butter.
- Shape into 1-inch balls and refrigerate for 30 minutes.
- Melt chocolate almond bark according to package directions.
- Remove balls from refrigerator and dip into the chocolate almond bark.
- Place dipped balls on parchment or wax paper and let sit until set.
Leave a Reply