
Introduction to Chocolate Cobbler
Chocolate Cobbler is not just a dessert; it's an experience that wraps you in a warm hug during chilly evenings or transforms a casual get-together into a memorable occasion. This delightful dish combines the rich, intense flavor of chocolate with a fluffy, cake-like topping, creating a unique layering of textures that's simply irresistible. But what makes Chocolate Cobbler the ultimate comfort dessert?
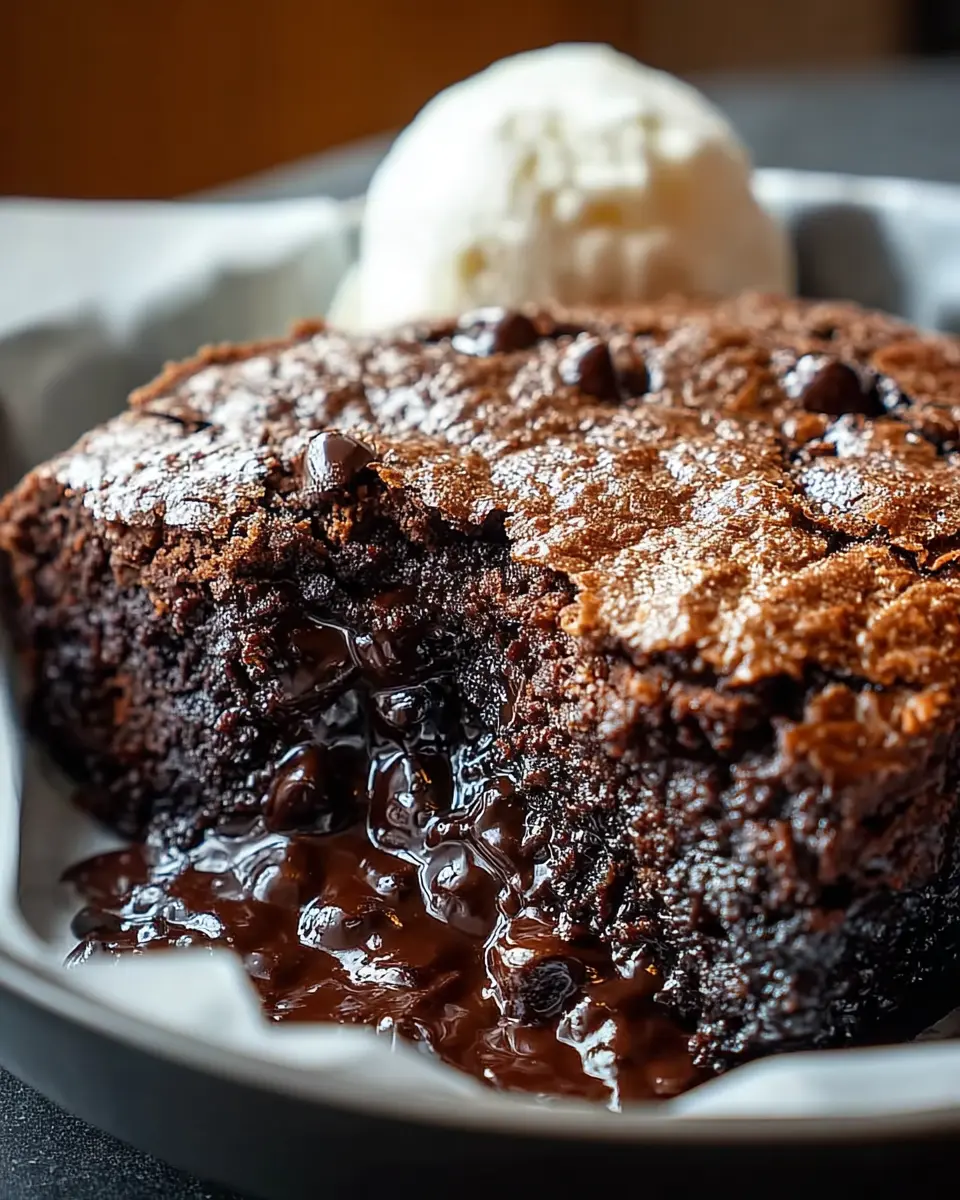
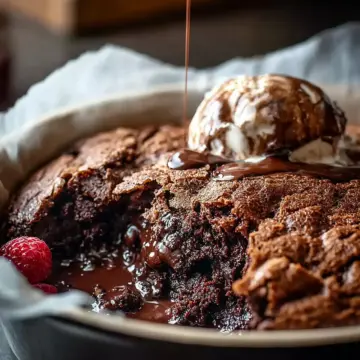
First off, its simplicity allows anyone, regardless of baking skill, to whip up a delicious treat in mere minutes. With just a handful of ingredients, you can create a dish that impresses friends and family alike. Imagine serving this warm, gooey beauty right from the oven, topped with a scoop of vanilla ice cream—pure bliss!
Additionally, Chocolate Cobbler is perfect for every occasion, be it a cozy movie night or a weekend brunch with friends. Its versatility makes it a crowd-pleaser, easily adaptable to various flavors or toppings. For those wanting a unique twist, consider experimenting with add-ins, such as peanut butter or fresh berries.
Got a sweet tooth? Dive into the world of Chocolate Cobbler and discover why this dessert is beloved by many. 🍫✨ For a rich, indulgent experience, follow this incredible recipe!
Ingredients for Chocolate Cobbler
Essential ingredients you need for a perfect Chocolate Cobbler
Creating a deliciously rich Chocolate Cobbler begins with the right ingredients. Here’s what you’ll need to bring this incredible dessert to life:
- Granulated Sugar (1 cup): This adds the sweetness that balances the cocoa’s rich flavors.
- All-Purpose Flour (1 cup): Essential for the structure, helping the cobbler firm up as it bakes.
- Unsweetened Cocoa Powder (½ cup): The star of the show, imparting that deep chocolate flavor we crave.
- Baking Powder (2 teaspoons): A crucial leavening agent that makes your cobbler rise beautifully.
- Salt (¼ teaspoon): A pinch really enhances the sweetness and balances flavors.
- Whole Milk (1 cup): Adds moisture and creaminess to the batter.
- Vegetable Oil (½ cup): Keeps the cobbler moist, ensuring it’s decadent and not dry.
- Vanilla Extract (2 teaspoons): Offers a warm, inviting flavor that complements the chocolate.
- Semi-Sweet Chocolate Chips (1 cup): These melt into gooey pockets of heaven throughout your cobbler.
- Hot Water (1 ½ cups): Surprisingly, this provides the second layer of magic by helping create that luscious chocolate sauce at the bottom.
With these key ingredients, you’re well on your way to a Chocolate Cobbler that will impress friends and family alike! For more information on the importance of each ingredient in baking, check out The Spruce Eats.
Step-by-step Preparation of Chocolate Cobbler
Making Chocolate Cobbler is a delicious journey filled with enticing aromas and satisfying flavors. Let’s break down the simple steps to create this delightful dessert.
Prepping the oven and the baking pan
First things first: preheat your oven to 350°F (175°C). This ensures an even baking temperature, which is crucial for achieving that perfect, gooey center. While the oven heats up, grab a 9 x 13-inch baking pan and give it a good greasing with butter or a non-stick cooking spray. This little act of preparation will prevent your cobbler from sticking to the pan and make for easy serving later on. Trust me, you’ll thank yourself when it’s time to dish it out!
Mixing the dry ingredients for optimal flavor
In a large mixing bowl, combine your dry ingredients: 1 cup of granulated sugar, 1 cup of all-purpose flour, ½ cup of unsweetened cocoa powder, 2 teaspoons of baking powder, and a pinch of salt (just ¼ teaspoon will do). Mixing these ingredients thoroughly at this stage ensures a well-blended batter and enhances that rich chocolate flavor. If you want a deeper flavor, consider using Dutch-processed cocoa powder for a more intense chocolate taste—an expert tip you won't want to miss!
Incorporating the wet ingredients smoothly
Once your dry ingredients are mixed, pour in the wet ingredients: 1 cup of whole milk, ½ cup of vegetable oil, and 2 teaspoons of vanilla extract. The oil adds moisture while the milk brings in creaminess. Stir these ingredients together until you have a smooth, lump-free batter. This is the moment when the brownie-like mixture comes to life, filling your kitchen with an irresistible scent.
Pouring the batter into the prepared pan
Now, it's time to pour your delicious batter into the greased baking pan. Slowly pour the mixture, taking care to spread it evenly across the bottom. This will ensure every inch of the cobbler is baked beautifully, creating a lovely texture throughout.
The secret to adding the chocolate chips
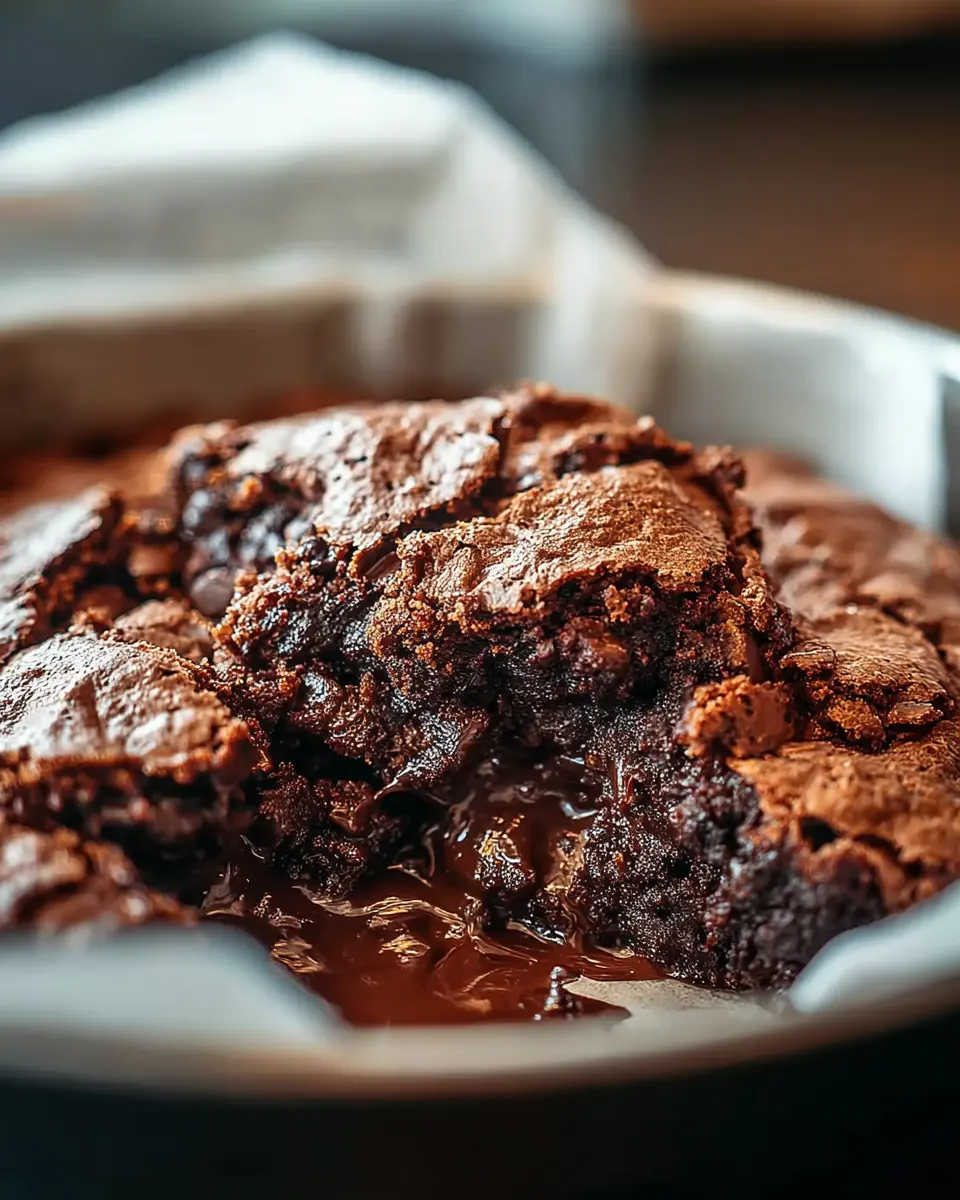
Believe it or not, the way you add those semi-sweet chocolate chips can elevate your Chocolate Cobbler from good to unforgettable. Sprinkle 1 cup of chocolate chips over the top of the batter, allowing them to float on the surface. As they bake, these little gems will melt and create pockets of chocolate within your dessert, ensuring every bite is rich and satisfying.
Pouring hot water – why it’s a game changer
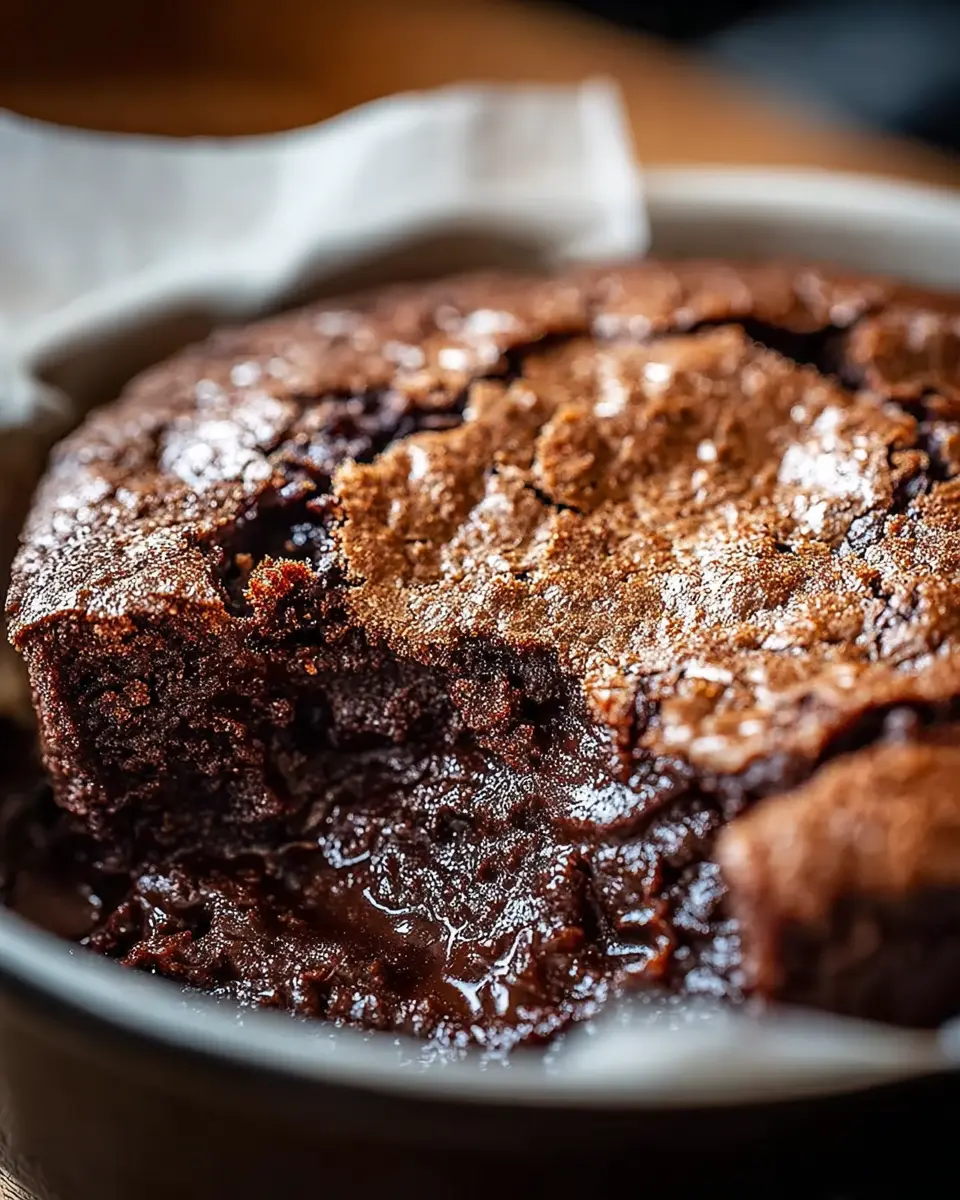
Here's the fun part: take 1.5 cups of hot water and carefully pour it over the batter. Resist the urge to stir; it may feel strange, but this step actually creates a luscious chocolate sauce beneath the cobbler, which forms during baking. Think of it as a surprise twist that makes your dessert even more delightful!
Baking to perfection
Finally, slide your pan into the preheated oven and bake for 30-35 minutes. Keep an eye on it; when the top looks set and a toothpick inserted comes out mostly clean, it’s time to take it out. Let your Chocolate Cobbler cool for about 10-15 minutes before serving. This cooling time allows the dessert to firm up slightly and the flavors to meld even more.
With these steps, you’re well on your way to impressing friends and family at any gathering with a fantastically rich Chocolate Cobbler! For more baking tips and tricks, check out reputable resources like FeedFeed or Serious Eats. Happy baking!
Variations on Chocolate Cobbler
If you’re a fan of the classic chocolate cobbler, why not mix things up a bit? Here are two delicious variations that are sure to impress your friends and family.
Mint Chocolate Cobbler
For a refreshing twist, try adding peppermint extract to your batter. Start with 1 teaspoon of peppermint extract along with the vanilla. You might even top it off with crushed peppermint candies after baking for a delightful crunch. Perfect for the holidays, this minty treat offers a delightful contrast to the rich chocolate.
Nutty Chocolate Cobbler
Feeling a bit nutty? Fold in a cup of chopped nuts—walnuts or pecans work beautifully—into the batter before baking. This addition not only enhances the texture but also provides a delicious layer of flavor that complements the chocolate cobbler perfectly. You can also sprinkle some toasted nuts on top for an eye-catching finish!
Don't hesitate to explore these variations; they might just become your new favorites!
Cooking Tips and Notes for Chocolate Cobbler
Common Pitfalls to Avoid While Preparing
When making your Chocolate Cobbler, attention to detail can make all the difference. Here are some common mistakes to watch out for:
- Skipping the Greasing: Always grease your baking pan to prevent sticking. Trust me, no one enjoys a dessert that clings stubbornly to the sides.
- Not Measuring Ingredients Accurately: Baking is a science! Use precise measurements for your sugar, flour, and cocoa to guarantee the best texture and flavor.
- Pouring Hot Water Incorrectly: Remember, don’t stir the hot water into the batter. This step is crucial for achieving that gooey chocolate layer you’re after!
The Importance of Letting It Cool
Patience is key! After pulling your Chocolate Cobbler from the oven, take a step back for 10-15 minutes. Cooling allows the dessert to set properly and enhances the rich flavors. This brief wait makes a world of difference when you finally dig in. Trust me, your taste buds will thank you! For a fantastic finish, consider pairing it with a scoop of vanilla ice cream or a drizzle of caramel sauce. Enjoy!
For further tips on baking techniques and ingredient substitutions, check out Serious Eats for an extensive collection of resources.
Serving Suggestions for Chocolate Cobbler
Best Accompaniments to Elevate Your Dessert
To truly take your Chocolate Cobbler to the next level, consider serving it with a dollop of freshly whipped cream or a scoop of vanilla ice cream. The creaminess beautifully contrasts the rich chocolate flavor, creating a multi-dimensional taste experience. For a gourmet touch, drizzle some salted caramel sauce over the top. Nuts, like toasted pecans or walnuts, can also add a delightful crunch.
Ideal Occasions for Enjoying Chocolate Cobbler
Whether it's a cozy night in or a festive gathering, Chocolate Cobbler fits seamlessly into any occasion. It's perfect for potlucks, holiday dinners, or just because you deserve a treat! Try it at a barbecue alongside some fresh fruit, or serve it as a show-stopping dessert during a casual dinner with friends. Each bite will have everyone asking for your secret recipe! For more dessert inspiration, check out this dessert pairings guide to enhance your culinary repertoire.
Time Breakdown for Chocolate Cobbler
Preparation Time
Get started with the Chocolate Cobbler in just 15 minutes! This quick prep lets you dive right into the fun of baking without a long wait.
Cooking Time
Bake your creation for 30-35 minutes. This time is perfect for the delicious chocolatey goodness to rise and set beautifully.
Total Time
In just under one hour, you can enjoy this warm, decadent dessert, making it an excellent choice for any occasion. After all, who could resist a comforting Chocolate Cobbler?
For extra tips on meal prepping, check out helpful resources from Food Network and Kitchn.
Nutritional Facts for Chocolate Cobbler
When indulging in a slice of Chocolate Cobbler, it’s good to know what you’re enjoying! Here’s a quick rundown of the nutritional information:
Calories per serving
Each serving contains approximately 375 calories, making it a delightful dessert choice.
Key nutrients
This treat offers about 15g of fat and 6g of protein, giving you a sweet boost alongside some essential nutrients.
Serving size
The recipe generously makes 9 large portions, perfect for sharing at parties or gatherings.
For further insights into balancing dessert with nutritional choices, consider checking resources like Healthy Eating and Nutrition.gov. Enjoy with moderation!
FAQ about Chocolate Cobbler
Can I make Chocolate Cobbler gluten-free?
Absolutely! To whip up a delicious gluten-free version of Chocolate Cobbler, simply substitute the all-purpose flour with a gluten-free flour blend. Many brands are specifically designed for baking, and they work great in desserts! Just make sure to check the blend for specific measurements on the package, as some might differ slightly from traditional flour.
What should I serve with Chocolate Cobbler?
Chocolate Cobbler is delightful on its own, but it pairs beautifully with a scoop of vanilla ice cream or a dollop of whipped cream for that extra indulgence. For a flavor twist, consider adding fresh berries or a drizzle of caramel sauce. These additions not only enhance the taste but also add vibrant colors to your dessert plate!
How do I store leftovers?
If you happen to have any leftovers of your Chocolate Cobbler (rare, but it happens!), store it in an airtight container in the refrigerator. It can last for about 3-5 days. Just reheat individual portions in the microwave or enjoy it cold — it’s delicious either way!
Conclusion on Chocolate Cobbler
Why you need to try this recipe today!
If you’re looking to indulge in a dessert that’s both comforting and delicious, the Chocolate Cobbler is a must-try. With minimal prep time and an irresistible chocolatey flavor, it’s perfect for any occasion—be it a cozy night in or a gathering with friends. So why wait? Treat yourself today!
Chocolate Cobbler: An Incredible Ultimate Recipe for Every Occasion
Equipment
- oven
- 9 x 13-inch baking pan
- mixing bowls
- whisk
Ingredients
- 1 cup granulated sugar
- 1 cup all-purpose flour
- ½ cup unsweetened cocoa powder
- 2 teaspoons baking powder
- ¼ teaspoon salt
- 1 cup whole milk
- ½ cup vegetable oil
- 2 teaspoons vanilla extract
- 1 cup semi-sweet chocolate chips
- 1 ½ cups hot water
Instructions
- Preheat: Set your oven to 350°F (175°C) and grease a 9 x 13-inch baking pan.
- Combine Dry Ingredients: In a large bowl, mix the sugar, flour, cocoa powder, baking powder, and salt until well combined.
- Add Wet Ingredients: Pour in the milk, vegetable oil, and vanilla extract. Stir until the batter is smooth and lump-free.
- Transfer Batter: Pour the batter into your greased baking pan, spreading it evenly.
- Sprinkle Chocolate Chips: Evenly distribute the semi-sweet chocolate chips over the top of the batter.
- Add Hot Water: Carefully pour the hot water over the batter. Do this without stirring. It might seem odd, but trust the process!
- Bake: Place the pan in the preheated oven and bake for 30-35 minutes, until the top is set and a toothpick inserted comes out clean.
- Cool: Once baked, let it cool for about 10-15 minutes. The dessert will continue to set and develop even richer flavors.


Leave a Reply